Monday, 28 August 2023

Grass on the Loading Ramp Segment

After preparation of the basic ground covering with used ground coffee and sieved gravel and dirt as well as small stones and twigs, I finally pulled myself together and fired up the static grass applicator. The loading ramp segment now has a basic cover of grass in varying tones. 

After a few days in my covered car parking the loading ramp segment is fully grassed.

Before I added the static grass I placed grass tufts where I thought it was appropriate. To fasten the static grass I used glue from RTS in two variants. The best for the large areas was the 'Gras-Flock Kleber – cremig' smeared on the ground surface with a flat brush. I varied the thickness and covering of the glue hoping to create different levels of grass covering. In places I didn't add glue allowing the ground to show through.

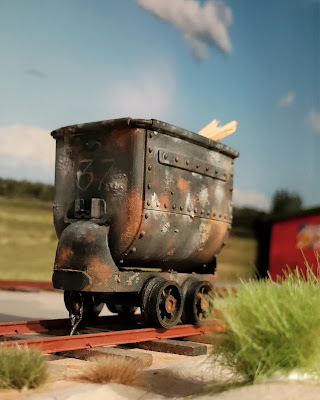
Nystrup loco no. 3 rolling down the lorry ramp with an empty skip. The static grass in the foreground is a mix of RTS grass colours 'Early summer' and 'Straw'.

The rear side of the segment is fitted with a predominantly dry and pale growth of grass. The front side is more green and lush. Although the grass towards the rear isn't too obvious when viewed from the front, the idea is that the lighter grass will blend better in with the photographic backdrop. 

Once the glue was applied, I started with a thin layer of 4 mm high grass with the name 'Summer' from RTS. Then I added 12 mm grass in the RTS grass colours 'Early summer' and 'Straw'. Where I wanted the grass to be green and fresh, living of good quaility soil I used most of the 'Early summer' variety and where I wanted the grass to look pale and struggeling with less fertile soil I used 'Straw'. 

The front side of the segment with the lorry loading area to the left. The homemade coarse grass from sidal rope isn't disqualifying itself totally, so I will probably be exploring that method further in the future.

With a basic covering of grass the layout segment begins to show some of the views I had planned. There is still much to do, though. As I worked outdoor the photos were made in my garden.

There is a lot more to do regarding grass and shrubbery on the loading ramp segment, but first I will work on the road area below the ramp. More plank road still needs to be made as well as covering the rest of the area with a suitable mix of sieved gravel - perhaps with some waterfilled potholes for variety. 

Friday, 25 August 2023

22 mm Grass Tufts - Blog Post #500

As I worked my way through my supply of grass tufts (mentioned in a previous post) I made sure to order additional ones to avoid the work coming to a halt. As I did that I noticed that the supplyer Green Stuff World now had grass tufts 22 mm in height in several colours. Consequently three packs of high tufts were ordered in addition to the 12 mm versions.

A view of three heights of grass tufts seen on the layout looking towards the fuel and lubrication shed.

I had ordered three colour variants of the 22 mm grass tufts and having arrived the colours 'Light green' and 'Dry green' seemed to fit perfectly fine with the colours I have previously used on the layout. The grass tufts with the colour 'Burnt' on the contrary, will probably remain in the box. The colour is much to dark and red for my taste. I have measured four tufts and they matched the stated 22 mm pretty well with some being slightly higher.

The grass tufts come in boxes measuring 15 x 9 cm.

While info on the box mentions the product's use in multiple scales, it doesn't mention 1/19 scale.

Three sizes of grass tufts from Green Stuff World.: from left 12 mm, 6 mm and the new 22 mm tuft.

As the title says this is the 500th post on this little modelling blog. When I started blogging more than 10 years ago, I hadn't thought it would develop into such a lasting activity. Now it has become an integral part of my modelling. Sometimes an inspiration and sometimes a reward allowing me to share the joy of a well executed project. I don't know if I will ever take the blog to celebrate the 1000th post. But so far I intend to keep up the blogging.

Wednesday, 16 August 2023

Vacation and Models

During my vacation this summer I visited several museums that used models to explain historical and technical developments. I have previously mentioned models from the German Museum of Technology in Berlin, their scope and history. This summer models from Danish museums caught my eyes and made me reflect on how models help convey historical knowledge and provide context for other exhibits.

Models help provide context and fuel the imagination of visitors in museums. Here a model of a 17th century ship yard. Photo from the Wasa museum in Stockholm I visited earlier this year.

In the museum at the old Mønsted lime works models in several scales are used to illustrate how lime was quarried and processed. A faily large 1/87 scale model of the complete works and open pit quarry gives a good overview of the general layout of buildings and track. In a much larger scale (probably around 1/13 and definately larger than 1/19) a series of small dioramas and a huge one illustrated work methods as well as design and operation of the lime kilns.

Showing how animal, humans and simple tools quarried chalk in the open lime pit area. One of a series of small dioramas illustrating sequences of quarry work and chalk treatment. The modelling is kept in a naive-illustrative style which actually works quite well. The primary function of the model is to show how a certain operation worked, not to be a highly detailed scale model.

A train emerging from the lime underground galleries. The portal is a fine model of the actual Mønsted mine entrance. While the skips are quite nice models, the locomotive is an approximation of an early model Pedershaab locomotive. For the average museum guest the very recognizable red brick mine entrance clearly sets the situation in Mønsted. 

Two of the Mønsted ovens are represented in a large ca. 2x4 m diorama. Extremely well done buildings with detailed lifts for feeding lime into the ovens. The nice skips incl. weathering is present here as well. Rather coarse ballast is used in the track.


The large model of the lime kilns features a cut-away side seen here and an exterior view as seen above. The diorama almost completely fills the room and is wasn't easy the capture the diorama in a single picture. The quality of the buildings in the diorama was of a quality I would be very proud of, if I had been the model builder.

A completely different kind of museum - the royal castle of Koldinghus - also used models to give visitors an idea of the castle's development over time. A series of small scale models illustrated how the castle's structure and design changed through its more than 750 years of existence. Other Danish museums use digital 4D illustrations projected onto walls or viewed through binoculars and all the methods have their advantages. The physical models allow you to see several appearances over many hundreds of years at the same time, something the digital tools I have seen used don't do very well.

Several neat little models in similar sizes allows the visitor to see the castle's development during the centuries. The models aren't particularly detailed, but that is not their purpose. They convey general size and design through the times and illustrate the castle's rise and fall.

On my own worktable I'm currently working with outdoor lamps for buildings and poles as well as continuing the work on converting the Essel Engineering Fowler. The work includes new cab interior, adding lights and details as well as fitting new battery and RC equipment. 

Sunday, 6 August 2023

Ballasting Track

Vacation time usually allows some modelling. This year less than usually, but I got some grass tufts, ground cover and ballasting done on the long module on my small layout.The ground cover is slowly spreading from the left side of the layout toward the right. Surely not the most exiting news, but progress nevertheless. During my vacation I was lucky to see some models being used in several museums. Quality and scope was very different, but they filled their role very well. A future post will show a few of them.

The ground cover is gradually spreading on the Nystrup Gravel layout.

As usual ballasting track is done with sieved gravel with coarser gravel sprinkled on top. In advance grass tufts have been placed in the track. Once sleepers have been swept clean with a flat brush and the ballast adjusted, I apply glue to the ballast. I use the traditional heavily thinned white glue with washing up liquid added to remove the surface tension. Once the ballast has been completely soaked with the glue mix there is time to clean away tools and materials while the glue dries.

Ballast has been applied, adjusted, sleepers swept and gravel particles removed from the tufts.

The areas with water/glue mix is spreading. I use a syringe to apply the glue mix. A slow, but very precise method.

A new section of track now waits for the ballast to dry, before the track can be finally swept clean for loose particles and tested.

While most Danish industrial narrow  gauge railways hardly used any ballast but dirt and earth, Nystrup Gravel has plenty of low quality gravel to use for keeping the line in decent shape. I try to vary the ballast from rather fine and clean in places to more dirty and coarse in other places with old leaves added here and there. 


One of the museums model I saw on my vacation use far coarser ballast than I do.