Friday 18 March 2022

Ford AA Recovery

In July 2021 I bought a pair of Ford A cars from a seller in France. One of them was fitted with a crane, and during my summer vacation I fitted a new rear suspension and axle to replace the assembly damaged during shipping.  

The Ford A recovery lorry in mid March. Wheel centres painted dark blue with basic weathering added. The crane assembly test fitted with a few items being tried out for detailing. 


The lorry in almost original state with only the crane detached.

I kept the crane assembly and the rest of the vehicle separate during the next stages in the process of getting the lorry in a condition to serve on my layout. First I removed all unwanted items on the car. The printed markings on the doors were removed with acetone, swabs and a soft cloth. Always remember to test the acetone on the model's paintwork where it can't be seen. One never knows if the paint will stand up to the acetone. In this case I only noticed a slight toning down of the gloss varnish. Then the silver footboard attachments were removed and the holes filled with putty and sanded smooth.

Printing on the doors removed and the holes remaining after the steps on the footboards was removed, filled with putty. The Modelu photographer was repaired with putty from the same batch. Once the two part putty is mixed I try to apply as much as possible to current projects to avoid waste.

The heavily chromed radiator and other parts were either painted over in a more discrete colour or treated with matt varnish mixed with a drop of grey paint. Being an older car in the early 1950's, I didn't want the recovery lorry to look too shiny. Under the bonnet I airbrushed the engine dark grey and added a wash of Vallejo engine grime and traces of rust. The inside of the bonnet was treated to look suitably used. 

To keep the bonnet open during painting I simply used masking tape.

I painted the crane light grey with some of the previous black paint showing to represent paint worn and flaked away. The wooden planks were given a layer of light beige brushed on with semi-dried paint. It's not far from dry-brushing, only with more paint on the brush. The result is a faily good foundation for the next stages in painting and weathering. The battery was fitted with wires and connetions to its terminals. I unwound the thread representing the winch wire and painted it a grey-brown colour with oil paint. The thread was then wound around the wire drum and passed through the A-frame to the top guide wheel, through the lifting hook assembly and finally fastened to the A-frame. The two drawbars were glued in place and and fitted with representations of steel wire used to keep them safely stored during transport.

The small load area behind the cab is being equipped with a selection of small items.Here is an early test wiith oil cans and wooden blocks. The battery has been fitted with wires and a bit of greenish corrosion.

The crane is painted to represent a worn piece of equipment with damaged paintwork. More weathering will be applied.

In the next phase I will finish painting of details and fitting licenseplates as well as applying weathering. I hope to fininsh the Ford before too long, as other projects are waiting.

Thursday 10 March 2022

Lights for Photography

I have always had a rather relaxed attitude to my photographs on this blog. If the focus was right, the light acceptable and the colour not too far off, I wasn't afraid of letting the picture feature here. I've probably had some very poor images on my blog compared to the modelling blogs I follow. My main concern have been to share my practical approach of building a free lance industrial narrow gauge railway based on Danish prototype practice. My priority hasn't been to show the prettiest pictures. Approaching the blog's 10 years anniversary that can't go on. I will from now on try to make a reader's experience a little more worthwhile with better pictures.

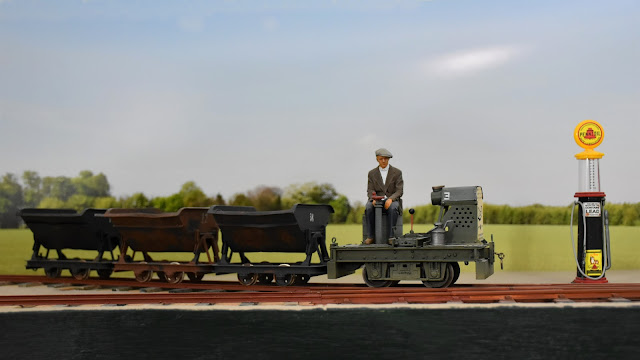
One of the first indoor photos on my yet unfinished layout with background and lighting from my new lamps. With practice the results will hopefully improve.

Particularly my ability to get the lighting correct has been challenged. My best shots so far have all been made with natural light in an outdoor setting. With an indoor layout that is of course not a viable long term solution. While my layout can be disassembled in two segments and brought outside it's not convenient every time I need to photograph something. Something had to be done as my pictures definately ought to be of better quality.

Consequently I have now aquired a cheap lighting system of two lamps with tripods and diffusing umbrellas. While the quality probably isn't great the lamps do give off a nice soft light much better than anything else I have used before.

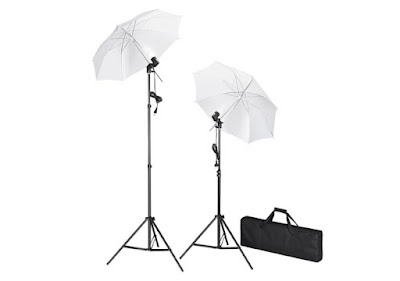
My new lamps aren't expensive or particularly fancy. But they are a lot better than the current makeshift lighting used for photography indoor. 

As much of my photography has been done outside I have mostly used my garden's shrubbery as a background. Now and then I chose a simple photo background printed out on standard A4 paper. A few years back I took a series of neutral images of typical flat Danish agricultural landscapes during summer and autumn and printed a some of them in 90x30 cm size landscape format. I mounted the prints on foam board for use as backgrounds when taking pictures of my 1/35 scale modules. Recently I dug the prints out again only to find them embarrasingly small in my new scale of 1/19. While the jpg-files may still work, the prints will have to be much larger. 

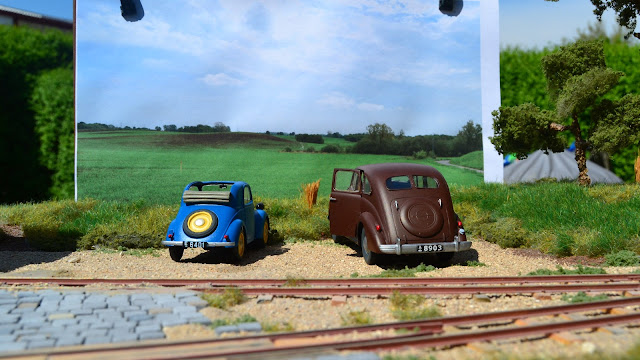
Photographing 1:35 scale cars in the garden with an ultra simple background. Summer, 2014.


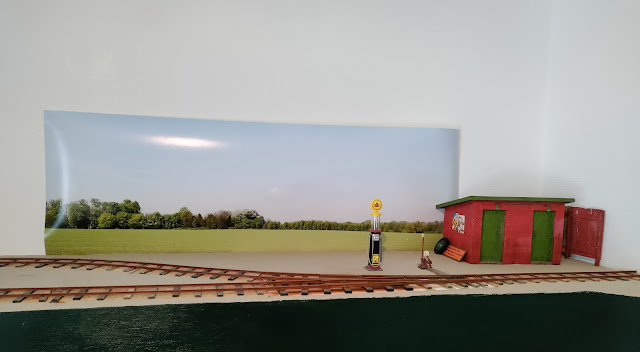
That's how tiny a print of 90x30 cm is looking on a 1/19 scale layout. Something bigger is definately needed.

While I will still be dragging the layout into the garden for work and photography I hope to be able to present it better with photos from its usual position in my library/workshop. Helped by better lighting and proper backgrounds. 

Friday 4 March 2022

Evidence of More Hudson Skips in Denmark

On Nystrup Gravel 4 Hudson 'Rugga' skips make up part of the company's fleet of skips. The predominant type of skip in Denmark was the German DIN type steel skip or very similar derivatives of it. As such the four Hudsons at Nystrup Gravel are of a rare speices in Denmark. I have documented 2 Danish industrial railways using the 'Rugga' type from Great Britain and I mentioned them in a blog post about the Slater's Plastikard 1/32 kit of the type.

Now a newfound image reveals that another Danish industry also had Hudson 'Rugga' skips, one of them even fitted with brake. The Storevorde gravel company east of Aalborg used at least 2 'Rugga' skips after World War 2.

Two Hudson skips (one with brake) being loaded with gravel. The image is labelled 1945-1950. The front of a locomotive is just visible to the right. It bears a certain resemblance to an O&K Montania LD2. Photo: Sejlflod Local Historical Archive.


All four British Hudson skips at Nystrup Gravel assembled in one line.

Slowly the number of Danish industrial railways with Hudson skips is increasing. Now Nystrup Gravel's use of that particular type of skip isn't as extraordinary as many observers have tended to believe.