Tuesday 26 January 2021

Track Works 1:1 Scale #1

 As the first rails have been spiked on the small Nystrup Gravel layout, I tried to find images of track works on a real Danish narrow gauge industrial railway. Not an easy task, as it seems to have been a type of activity not considered particularly photogenic.

A team of six workers at the Funder Skovhuse brick works building and adjusting track. Notice spare track and a wagon turntable in the left background. Sleepers are a charming variety of what seems to range from cut down standard gauge sleepers to fence posts. Probably 1930-1940. Photo: Silkeborg Arkiv, B20167. 

Track laying and maintenance on most Danish narrow gauge industrial railways was a simple matter: if the train stayed on the track, the track was considered fine. Only when derailments became too frequent, track would be repaired. The track layout would usually change very little at most industries. Only in the gravel pit, stone quarry or peat harvesting area, track would be moved regularly as raw material was quarried and transported away.

Aerial image of Funder Skovby brick works. The ramp for the track to the clay mixing facility can be seen cutting through one of the drying sheds in the centre of the image. There is evidence of old clay pist to the left. Clay extraction at the time of photography seems to happen on the north side of the road crossing diagonally from top right. Photo: Royal Air Force, 1954. 

Sunday 24 January 2021

Track Building Started

The first lengths of rails have finally been laid on the 16 mm scale Nystrup Gravel layout. It has taken far too long, but now the track is down and working, although it is only a very short length.

The first length of track spiked on the Nystrup Gravel layout.

The Peco Code 143 rail is 3,5 mm in height, corresponding to a ca 10-12 kg/m prototype rail. I have laid the sleepers with a scale 60 cm between centres. With 10-12 kg/m rail the track is fit for an axle loading of 2-2,5 tons with a good margin for heavier loads. It's not my intention to employ locos or wagons that will place much higher loadings on the track, though.

My track has been designed and reality checked with real industrial railway practice. I've used rail manufacturers' track manuals and the 'Industrial Railway 101' standard reference work 'Feldbahnen' by Paul Roloff, first published in 1950. The book is a practical guide for track foremen, contractors and planners helping them build, maintain and run narrow gauge industrial railways in an effecient and profitable way. 

'Feldbahnen' written and compiled by Baumeister, Paul Roloff. A helpfull companion for any enterprising track foreman.

For track building I made three wooden track gauges reminiscent of the ones used on real narrow gauge industrial railways: a lenght of wood matching the gauge nailed to a piece of wood wider than the gauge to lay on top of the rail heads. Simple, easy to manufacture and fast when in use by the track workers.

Track gauge as illustrated in 'Feldbahnen'. A simple construction to keep the track in gauge during spiking.

My track gauges from wood and the gauge for keeping the right sleeper spacing.

Track gauges in use. The dress maker's pins keep the track in position during spiking.

The spacing between the sleepers is set by a 30 mm wide wooden block made from 3 pieces of old fireworks rocket sticks picked up after the new years celebrations. An easy and cheap supply of wood (as long as fireworks rockets are allowed). The sleepers are placed with the assistance of the guide block, their positions marked with a pencil, glue applied and the sleepers permanently fixed to the cork trackbed.

To avoid the rail ends at the module end being damaged during handling the module, I soldered the rail ends to brass screws firmly embedded into the module end. On my old 1:35 scale modules this method ensured easy alignment of track when setting up modules and a solid construction, keeping the track safe during transport, handling and setting up.

I will be using the Peco SM-32 Code 200 small radius turnouts I bought for test purposes. They will be rebuilt a little to fit into the Nystrup Gravel track and make them connect to the Code 143 rails.

Thursday 14 January 2021

Donation Giving New Insight into Nystrup Gravel History

The family of Nystrup Gravel's late workshop manager Thorleif Petersen has on several occasions donated documents, photographs and small items with relevance for my study of the gravel company's 600 mm line. Back in 2014 Thorleif's graddaughter gave me a heap of papers and some photographs from a trip Thorleif made in the 1980's to Nystrup. Now I've had yet another donation from Thorleif's family.

Metal sign, camera and maps. Some of the items donated by the Petersen family.

While the old Agfa 600 Synchro Box isn't particularly collectable, it's funny to handle the camera used by Thorleif to take a lot of photographs around Nystrup. Most of them still unpublished. The maps however is a tresure trove of info. Apparently Thorleif marked his visits to locations where he searched for spare parts and equipment for Nystrup Gravel. Some of the locations are well known as other documents have previously shown Thorleif to have visited and in some cases bought equipment. It is however a huge surprise to see the sugar beet railways clearly marked out on the maps and a note made in the margin: "One English loco 150 hp Sakskøbing". It's not known what the note means and so far I have failed to find evidence for a loco made in Britain with 150 hp effect at the sugar beet railways at all. A matter I will be looking into during 2021!


The sheet metal sign (a bit larger than A4-format) is an early health and safety measure giving a short notice on the rules of maximum gradients when excavating gravel. Current rules when excavating are quite different in Denmark today, allowing only gradients of 1 to 1 in contrast to the 2 or 4 to one mentioned on the sign.

Previous donations have included a wooden box from an anonymously reader of the blog.

Monday 11 January 2021

Radio Model

Among some of the countless accessories available for a model railway in 1/19 scale, I was tempted by a 1940-1950 radio. As I had a package sent to Denmark, I added the radio to the order. I bought the radio from Dioramaparts, a German company selling detail parts and kits through eBay in 2019. The company seems to have stopped trading since.

The printed front panel.

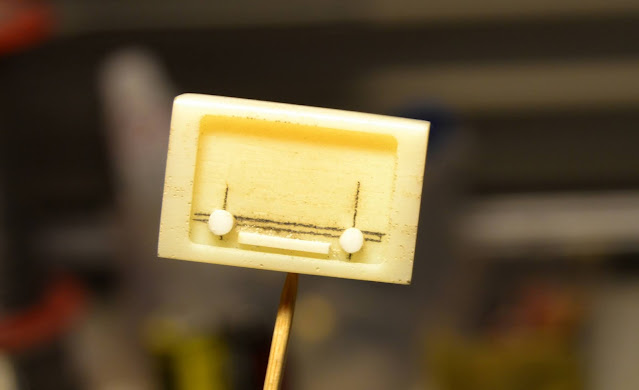
The resin cabinet fitted with plastic stock dials and buttons.

To call the radio a kit is an exaggeration. The zip lock bag contained one resin radio cabinet, one printed radio front panel and a piece of thin metal wire for the antenna. I sanded the resin part lightly to achieve a smooth surface. I then added two large dials and the row of smaller buttons under the frequency scale from plastic stock. On the back I added a small piece of plasticcard to represent the metal plate holding power cable and antenna socket. I then primed the radio and painted the cabinet dark brown and the back a lighter brown to represent the cheaper wood used for the parts of the cabinet not in direct view. I cut the loudspeaker and scale from the printed front panel and glued them in place separately. The loudspeaker panel was given a touch of matt varnish, while scale and dials were given gloss varnish. The dark brown cabinet sides and top was also gloss varnished. A roll of power cable was made from solder wire, while I chose not to fit an antenna. 

Radios looked very cool in the 1950's. Here is a Danish made TO-R Merkur D 2 from a 1951 advert.

I ended up adding 5 home made parts to the radio, keeping one kit part unmodified, changing another and discarding the third. Not too unusual when I model. Now I have to find somewhere to place the radio. Perhaps in a small shed or near a window in the planned relief building on the in progress layout?

The radio loaded in the back of the Chenard & Walcker van. I hope the driver is a careful one, as the radio is a fragile item fitted with vacuum tubes that break easily.


A lot of car for a light load - a single radio.