Among some of the countless accessories available for a model railway in 1/19 scale, I was tempted by a 1940-1950 radio. As I had a package sent to Denmark, I added the radio to the order. I bought the radio from Dioramaparts, a German company selling detail parts and kits through eBay in 2019. The company seems to have stopped trading since.
 |
The printed front panel.
|
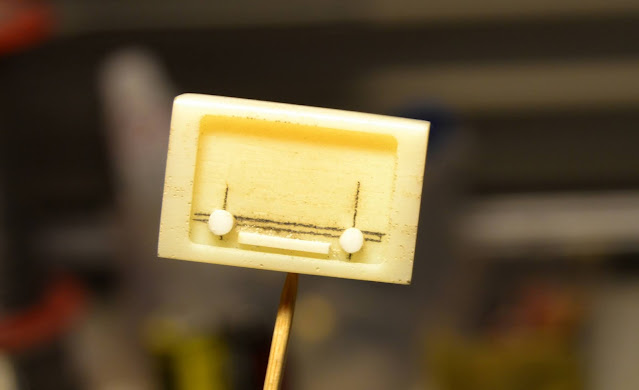 |
The resin cabinet fitted with plastic stock dials and buttons.
|
To call the radio a kit is an exaggeration. The zip lock bag contained one resin radio cabinet, one printed radio front panel and a piece of thin metal wire for the antenna. I sanded the resin part lightly to achieve a smooth surface. I then added two large dials and the row of smaller buttons under the frequency scale from plastic stock. On the back I added a small piece of plasticcard to represent the metal plate holding power cable and antenna socket. I then primed the radio and painted the cabinet dark brown and the back a lighter brown to represent the cheaper wood used for the parts of the cabinet not in direct view. I cut the loudspeaker and scale from the printed front panel and glued them in place separately. The loudspeaker panel was given a touch of matt varnish, while scale and dials were given gloss varnish. The dark brown cabinet sides and top was also gloss varnished. A roll of power cable was made from solder wire, while I chose not to fit an antenna.
 |
Radios looked very cool in the 1950's. Here is a Danish made TO-R Merkur D 2 from a 1951 advert.
|
I ended up adding 5 home made parts to the radio, keeping one kit part unmodified, changing another and discarding the third. Not too unusual when I model. Now I have to find somewhere to place the radio. Perhaps in a small shed or near a window in the planned relief building on the in progress layout?
 |
The radio loaded in the back of the Chenard & Walcker van. I hope the driver is a careful one, as the radio is a fragile item fitted with vacuum tubes that break easily.
|
 |
A lot of car for a light load - a single radio.
|


No comments:
Post a Comment