Friday 27 December 2013

Christmas Modelling (1/35)

Besides celebrating Christmas and spending time with the family I've had some time at the work bench. Subjects of the Christmas attention were my Schöma gas generator loco and a Danish army lorry.

I'm preparing the 3D-printed Schöma loco for fitting of the BullAnt I have ordered from Australia. To add strength to the loco's frame I fitted brass bars to the frame's end plates. They also add weight to the loco. More weight will be added later when I have determined how much room the drive unit, decoder and light arrangement takes up.

Like a turtle... The Schöma is having its frame reinforced.

Close up of the operation: the brass bar will provide strength to the frame and prevent the front plate from deforming. I have no experience with 3D-prints' long term stability and I like to be prepared for all eventualities.
The army lorry is an addition to a recovery column I started building a few years ago. So far the column isn't too long, comprising only two vehicles; a CMP with scratch built generator and a Scammell recovery truck.  Most Danish army lorries in the years after the second world war were equipment drawn from the British army's surplus. The lorry I'm building at the moment is a Bedford QL from a IBG kit. Large numbers of this type of lorry came to Denmark after the war. Most were in need of repairs after use in the war, some even had bullet holes in their bodywork. The 1:35 kit assembles with no fuss and I really like to build a kit out of the box now and then.

The chassis of the QL assembled and primed. The cargo bed with a load of spare wheels isn't quite as progressed. The two sitting figures are from Ultracast (figures 35011 and 35036) and very nice. In the fifties the Danish army uniform relied heavily on garments donated by the British army, so WW2 figures in British uniforms only need minor modifications to pass for Danish squaddies. The beret was only introduced into the Danish army in 1958 (in armoured troops) but I really thought it going too far to replace them with forage caps.
I intend to make the recovery column  a little longer in the coming years. Hopefully with two more CMPs to make the column a bit more uniform. Some day, on a stretch of road parallel to the gravel line, you might see the column pause during one of the early Cold War's many manoeuvres in the woods around Nystrup and Skovby.

The Scammell recovery lorry built from an Accurate Armour resin kit in 2008. The Danish army had a few of these imposing vehicles of unmistakably British design. My model still lacks Danish army decals - which are currently being designed.

Wednesday 18 December 2013

A Review of 2013 (1/35)

2013 turned out to be almost as productive as 2012. I managed to build a new resin kit of a Jung locomotive. Mostly from the kit's parts but as usual I couldn't resist fitting some scratch built parts, a specially adapted figure and my first custom made etched works plates with the help of Mark Hesketh. One of my older locos was fitted with decoder and new O-rings and could take its place among the serviceable locos at Nystrup Gravel.

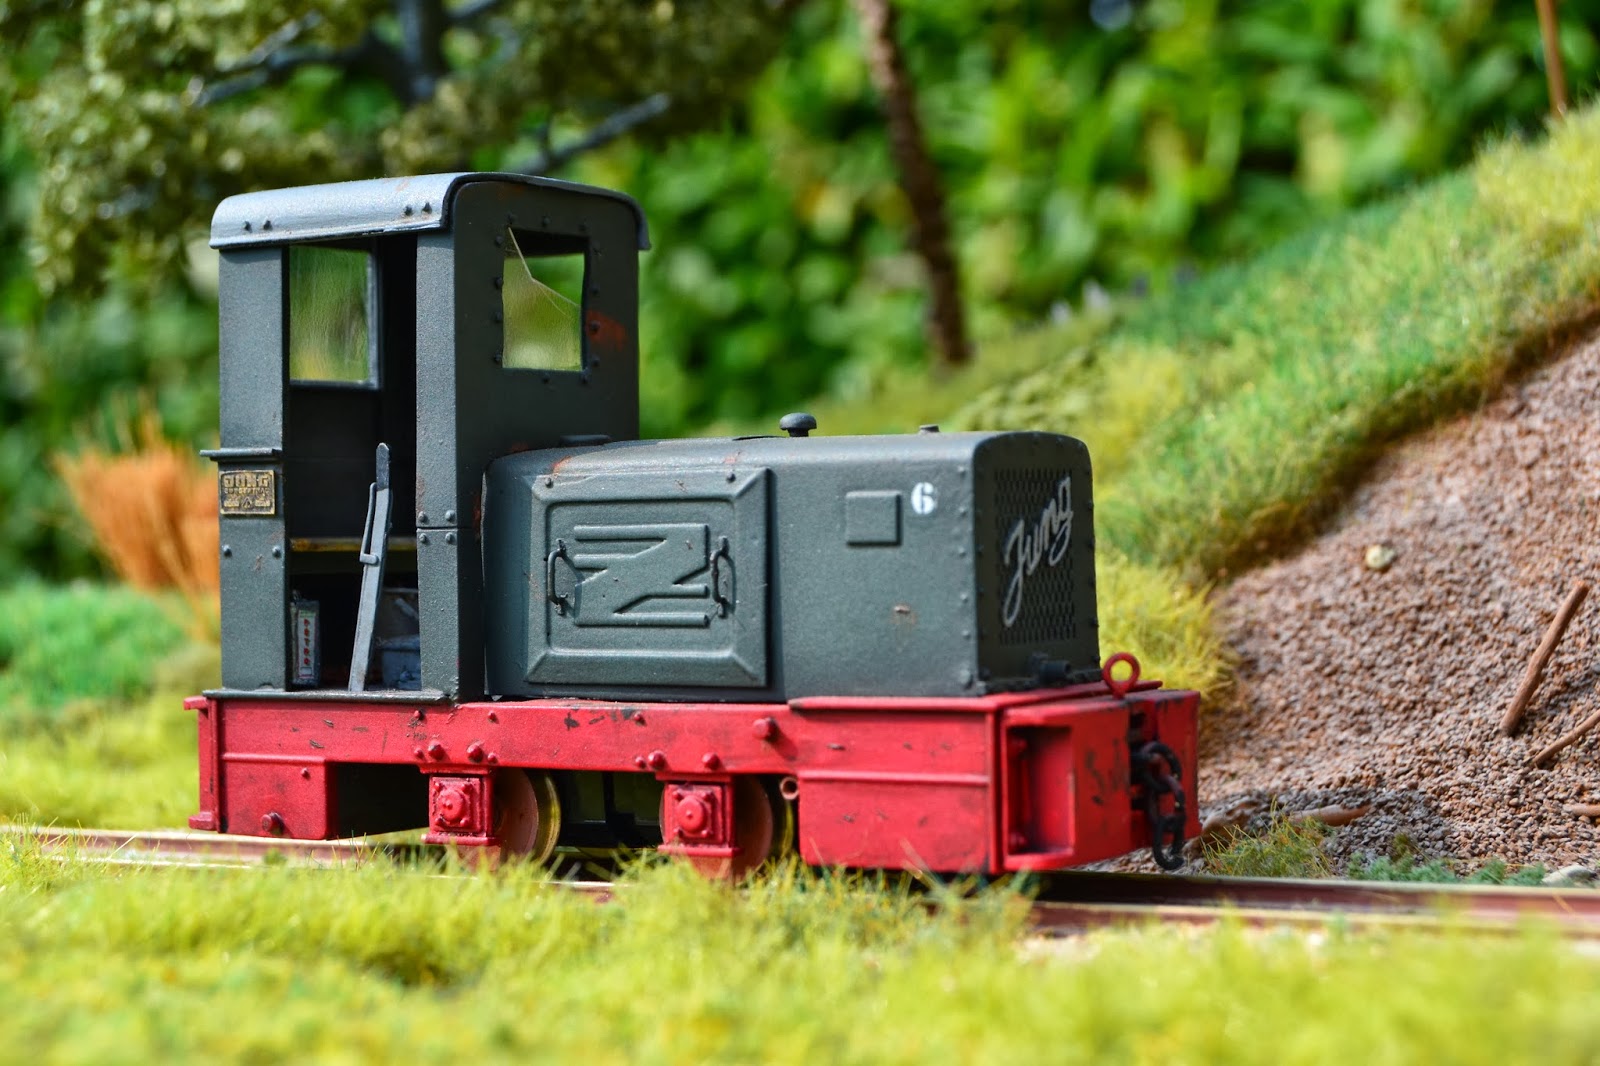
The U-Models' Jung ZL 114 with etched works plates on the cab. The image serves as a reminder to me in Denmark that the cold and grey weather I suffer for the moment will give way to spring and summer in three month's time.
I also managed to finish several road vehicles (and a huge off road crawler tractor). Among the road vehicles were Nystrup Gravel's director's Opel Kapitän  and haulage contractor Hansen's Bedford O tipper.

My research in the history of Nystrup Gravel also made progress in 2013. I found a complete binder with papers from the company and quite a few old pictures. Here is one of the company's director's Opel Kapitän about to cross the viaduct over the gravel line.
In 2013 there seemed no end to the support from manufacturers for a modeller like me. A new etched brass O&K MD2 in 1:35 from Hesketh Scale Models and steel sleepered track panels from James Coldicott were very welcome. A surge of 3D-printed locos in 1:35 was suddenly made available on Shapeways. I bought my first and while the quality could be a little better, I was quite satisfied. And last but not least: What would be the release of the year (or the decade, dare I say!) is just about reaching the web shops: continental type skips in 1:35 in etched brass from the 1:35 industrial narrow gauge-alliance Hesketh & Snoodyk. I will now be able to exchange my old skips, first of all my Scale Link, some of which have served Nystrup Gravel since 1999. The Scale Link skips will not be scrapped but kept in reserve. I never throw out anything!

In October this little blog passed 30.000 page views. Just a fortnight later my collection of images on Flickr passed 100.000 view counts and November 2013 was the first month when Nystrup Gravel logged more than 3000 page views in a single month. I don't know if that is a lot in comparison with other related blogs, but I must admit being a little surprised that something so peripheral and downright weird as industrial narrow gauge modelling in 1:35 can attract that kind of interest.

As usual I have spent quite a few weekends at the 700 mm. gauge heritage railway HVB and besides helping explain industrial railways to modern families and preserve history the work also gives great first hand knowledge of what works in reality. An important ingredient in modelling. A few trips abroad provided me with visits to narrow gauge railways.

Surely the weather isn't always supportive of volunteering on HVB, but when the going gets tough, the tough gets going. Here the parasol I was holding to protect my friends from the rain has collapsed because of a sudden gust of wind. Working on a 1:1 railway surely is different from sitting at my modelling work bench. Photo: Finn Sørensen.
Despite all other accomplishments at or near Nystrup Gravel, the emergence of a twin to Nystrup's speeder no. 7 surely counts as the year's most notable occurrence. A 1:35 speeder built in Canada that exactly portrayed all features of my own little speeder really surprised me. I was incredibly honoured to see one of my models inspire a fellow modeller to build a model. I'm quite sure it was a once in a life time experience and I must look forward to other things in 2014. New skips, a running gas generator Schöma, a few road vehicles and perhaps the two bogie flats will enter service on my 1:35 version of Nystrup Gravel. The anniversaries of the battles of the Great War will probably lead to some modelling projects in the coming years. I don't expect to run out of inspiration.

Merry Christmas and Happy New Year!

Monday 16 December 2013

Progress (Minor) on Two Bogie Wagons (1/35)

I have been making slow progress on the two Hudson bogie wagons. After having done the four bogies for project from rebuilt Scale Link skips, I started bending some of the etched metal parts while on a small vacation in the summer cottage. Returning from vacation brought a lot of non-modelling demands on my time and other modelling projects even managed to overtake the bogie wagons' place on my worktable. Now it's December and I thought it might be possible to finish the wagons before New Year.


Bending frame/bottom of the wagons. One frame/bottom has been bent up in my little etch bender from Mission Models. A full etch is seen in the top right of the image.
I think I mentioned, that the wagons come without bogies and their associated mountings. After some head scratching I made bogie mountings from scrap brass and nuts to fit my standard M2 bolts. To make life easier I have long time since standardized my use of bolts and nuts for mounting bogies, loco bodies etc. to M2, making sure I'm not in doubt what to do when a nut or bolt is lost. Unfortunately I was one M2 nut short.

My old supplier of small nuts and bolts had closed down so I ordered a nice selection of M2 nuts and bolts from www.modellbauschrauben.de in Germany.

A frame seen from below. Bogie mountings soldered inside the frames. On the other side of the brass piece with a hole in it is a M2 nut to take the bogie mounting bolt.
As a consequence of the missing nut, I decided to concentrate work on one wagon. With the end plates bent up and the associated angles ready to solder in place, it turned out that the angles were too short by several millimetres. Not wanting to worry about who's fault it was (me or the kit designer), I simply soldered the end plates in place. I will fit strengthening angles from brass or plastic profile later.

Being slightly put off by a missing bolt and short angle irons, I put both wagons back into their card board box. I will spend the coming Christmas Holidays doing some preparatory work on my gas generator Schöma and building a Danish army lorry. The wagons will have to wait...