Sunday 26 April 2015

Hansen's Ford Double Cab (1/35)


Some time ago I mentioned that I had been working on combining the resin cab I bought from Brazil last summer with the 1:35 ICM kit of the Ford G917T. As usually for ICM the kit has many small parts. I'm probably getting used to ICM's kit design as I got the chassis and wheels assembled quite quickly and without the usual frustration. Some info on the Ford G917T kit can be found here. To fit the new cab I performed minor surgery to the chassis.

Finished chassis. The supports for the foot boards are destined for removal, though. They serve no purpose for the new cab.

The double cab is a real piece of kitchen table resin casting, probably done in very small numbers. It takes some work to clean up, but is better cast than the Ford van I built last year. I'm full of admiration for the dedicated modellers world wide that helps to supply parts or kits of obscure prototypes.

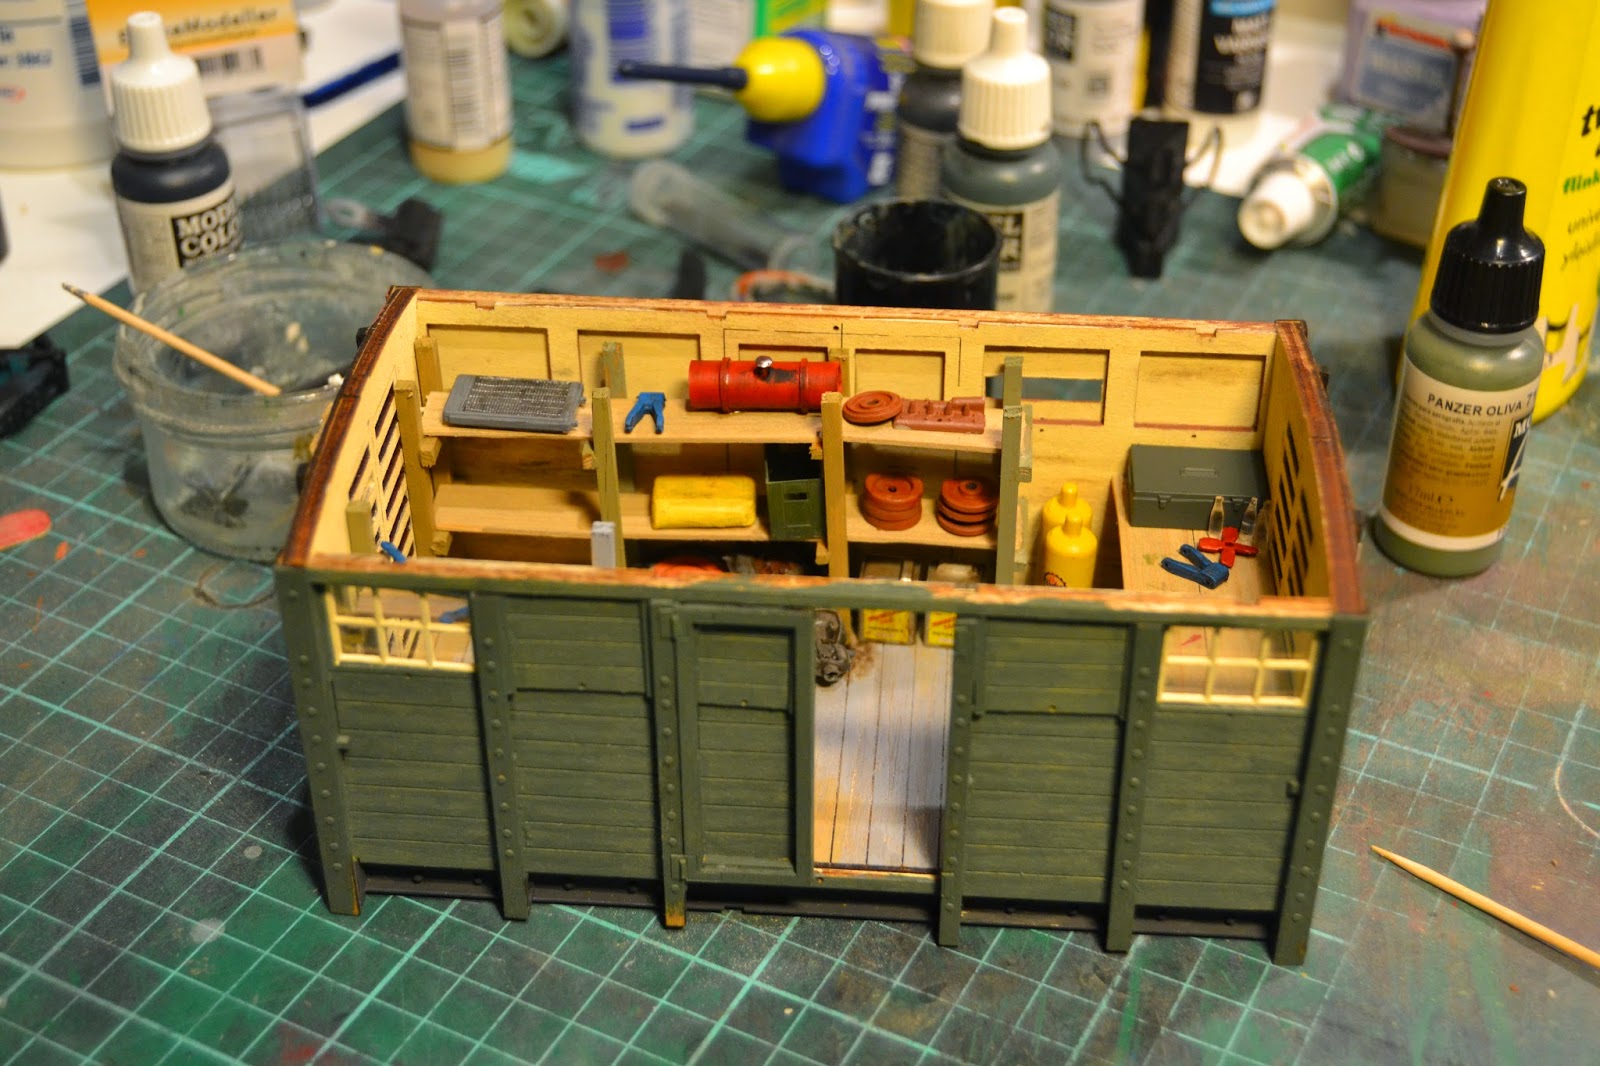
The resin cab is primed and painted on the inside. It needs a little repair here and there with Miliput.

I'm working on the figures I plan to place in the cab. I work from the set 'German Artillery Crew Riders' (no. 35040) from MiniArt. It involves some macabre amputations of legs and sanding of rear ends. I also cut off any detail that is of a military nature and modelled new cloth caps from Miliput. Unfortunately the Miliput failed to harden properly. After several days it was still soft and tacky. I usually get the mix of the two rolls right, maybe the Miliput was too old? New pack of Miliput opened, mixed and new caps modelled. Not too much will be seen of the figures through the windows, so I hadn't planned spending much time on the figures.

Three figures for the cab. Two caps and one upper head in progress. Work with sand paper is next. Driver still needs arms. They will no doubt be sourced from the spares box, as was his co-driver's.
 The double cab lorry was a former German military lorry, possibly commandeered from civilian use in Norway. After being taken over by Hansen the cab received a quick coat of green paint, new head lights and license plates. Due to its large cab the lorry could carry a considerable work force; very convenient as any bulk load had to be shovelled of the cargo bed.

The cargo bed had to be shortened to fit the chassis. That was no major task. The shortening of the sides were, however. I had to cut each side into four pieces to remove the right amount of material at the right spot to achieve the desired spacing of the metal strapping. Not difficult but time consuming. As the kit supplies two cargo beds I took advantage of the extra parts and made the sides on the lorry double height. With high sides the lorry could carry the maximum load even if the load was light and high volume (like peat or brown coal).

Chop-chop! A very laborious way of trimming a piece of plastic.

Friday 24 April 2015

Newspaper Clipping: New Loco for Nystrup Gravel

I started 2015 with the goal of getting some research into the history of Nystrup Gravel done. I didn't have much time for that last year. This year has already produced confirmation of the existence of a Fowler diesel loco at Nystrup Gravel. I have now scanned the newspaper article mentioning the arrival of the loco. For the large part of this blog's audience not fluent in Danish I have taken the trouble to translate a few sentences into English. See below.

The article is most certainly the result of the gravel company's active public relation policy driven by the then new director. The local press, politicians and administrative staff from local government was invited to Nystrup as often as deemed necessary by the director. Besides having access to parts of the company's archive that policy enables me to trace the company history in the pages of the local newspapers. The article below (dated January 17th 1934) is just one example.


The article begins: “Yesterday Nystrup Gravel’s new British diesel locomotive arrived on a heavy load trailer. The new locomotive is necessary because of the rising production following the many government projects initiated to fight unemployment…” The journalist continues describing the loco:

“The new diesel locomotive is a marvellous example of British engineering and technical proficiency. In its glorious coat of green paint it completely outshines the gravel company’s smaller gasoline locomotives from Danish makers.” The director was so keen to show off his new loco that the press was obviously invited for a ride: “Anyone interested was treated to a tour in the locomotive’s spacious cab and could feel the mighty power of the engine vibrating in every lever and cab floor. The cab allows a flow of fresh air and provides a great view for the driver, something the workers will no doubt appreciate during shunting.”

No doubt the journalist hadn't much experience of loco driving in the cold Danish climate. Only on warm summer days did the drivers appreciate the cab designed for much warmer climates. Most of the year they were freezing despite trying to close the cab with a variety of tarpaulins and wooden boards. The floor vibrating with "the mighty power of the engine" also failed to please the workers for some reason.

Friday 17 April 2015

Factory Shed Finished (1/35)

The grounded van shed is now finished. I have finished building, detailing, painting and first stage of the weathering. The kit is fast built with no hassle. I fitted some rivets on the frame as I thought it looked rather naked. I used TichyTrains rivets 8078 (,070'') glued on with AC-glue. On the end of the frame I placed mounting plates for the buffers from plastic card.

The plastic rivets are just visible on the frame.
The van is painted in two colours. Two of the four sides are red-brown while the other two are green. The red-brown is supposed to be the oldest paint and on the outside of the fenced in factory yard. The van is placed as an integral part of the fencing and only the two green sides are facing 'inwards' to the yard.
The faded red-brown sides of the van. The door boarded up with an old plank. The roof is covered in surgical tape painted dark grey.
The shed is fitted with a rudimentary interior partly visible through the open door and the two small windows on the green side. The van is fitted with two 12 V bulbs to provide some lighting, making sure work can be carried out in the shed during the dark months or evenings.

Lights on!
I weathered the van with oil paint in several thin washes. I used black, burnt umber and burnt sienna. When the van is permanently fitted to the module it will receive final weathering to blend in with the environments. I'm currently preparing the module where the van is destined to be the first building fitted.
A last view into the van before the roof went on. The shed will be placed in the yard of an agricultural machinery repair shop. The shelves are full of parts I dug out of my spares box.

Sunday 12 April 2015

Electrical Installations (1/35)

In 1:35 scale it is sometimes a challenge to model details that in smaller scales would be sufficiently modelled with a blob of glue. One such item is electrical insulators. On the grounded van shed on my new module I have recently fitted insulators made from brass by the Polish company Part. I think they worked out rather fine.

Slow progress, but it's almost finished now.

Close up of the electrical installation. Still unpainted, though.

The insulators are turned brass and can be had with different lengths of mounting wire. I'll probably find space for some proper poles with more insulators. I'm sure they will help to convey a sort of industrial atmosphere to the module. If electrical wires, insulators and telegraph poles are your 'thing' a visit to the website of The Telegraph Pole Appreciation Society is a must. Make sure not to miss the interesting feature 'Telegraph Pole of the Month'.

My little bag of Polish insulators. They look very much like a type commonly used in Denmark.