Thursday 27 December 2018

2018 in Review

Before long 2018 will have passed and a new year begins. 2018 was a year of radical change for Nystrup Gravel. Not even the little model railway's move in 2014 matches the change that hit the gravel company in 2018. Having modelled in 1:35 for more than 15 years I had a sense that something had to change to keep my motivation as high as usual. Before 2018 had come to an end, I had switched scale from 1:35 to 16 mm scale - also known as 1:19,05 on 32 mm gauge track.
An illustration of the change currently in progres on Nystrup Gravel. A massive increase in size.
I began 2018 with finishing a 1:35 scale resin kit of a Soviet tractor with dozer blade. A great kit from Balaton Modell in Hungary. I fitted it with homemade decals for an imaginary East German brick works.
The Ernst Wollweber brick works tractor was my first finished model of 2018. It also turned out to be one of my last models in 1:35 scale.
An extraordinary amount of my modelling took place outdoor in one of the sunniest and hottest summers ever recorded in Denmark. No end to hot afternoons after work and lovely evenings to spend under the parasol modelling and sipping cool wine.
Approaching the limit for modelling in the garden. Darkness brings an end to detail painting. The birds stop singing and the bats begin their hunt for insects. The mind wanders and new projects are considered.

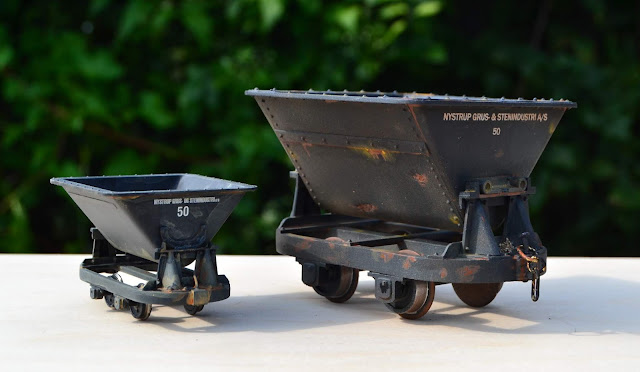
Some of the summer evenings were spent building a living van and a water cart for my steam roller. Both wagons were largely built from left over parts and plasticcard. Many years of modelling has enabled me to build up a large collection of parts (some of them in different scales) that can come in useful. That made the two wagons my cheapest projects of the year.
A steam roller road train on my road photo plank photographed in my garden in the warm Danish summer.
A trip to Wales made a profound difference for my modelling. In the shop at Tywyn on the Talyllyn Railway I picked up a 16 mm scale plastic kit. Under usual circumstances I would never have looked at or handled a kit in any other scale than 1:35 or 1:32. But as I had recently been lacking motivation in my modelling, my usual focus was probably disturbed. Holding the GVR granite wagon kit from Binnie Engineering in my hand I remembered the articles in Narrow Gauge and Industrial Railway Modelling Review about 16 mm scale and the kit was placed on top of my heap of books on the counter. 
My double identity GVT wagon. It's numbered 130 on one side and 157 on the other.
I started the 16 mm kit while on summer vacation and had great fun with the assembly. The large size appealed a lot to me and it even allowed me to work on the kit with a bandaged broken left wrist. I ordered af few more kits to get a better feel of the scale and checked the availability of road vehicles and figures. It turned out that what I needed for a small layout was available and I started to wonder if a change of scale would be the right thing.


After much head scratching and consideration I decided it was time for radical change and as a consequence I now model in 1:19.05 scale. A selection of my 1:35 scale models have since found a new home on fellow European modellers' layouts. I will offer more models for sale before too long.
Loco 78 and a few skips in company with a 1:35 scale figure named 'Claus' on a German layout. I hope they will contribute to the develpoment of the local industry in the future. Photo: L. Behme.
It's a big task beginning from scratch and building up a new model railway. 2019 will be used to build up a larger collection of rolling stock and finishing my first 16 mm scale locomotive as well as buying my first length of track. I hope to start traffic as soon as posible as demand for gravel continue to be high.
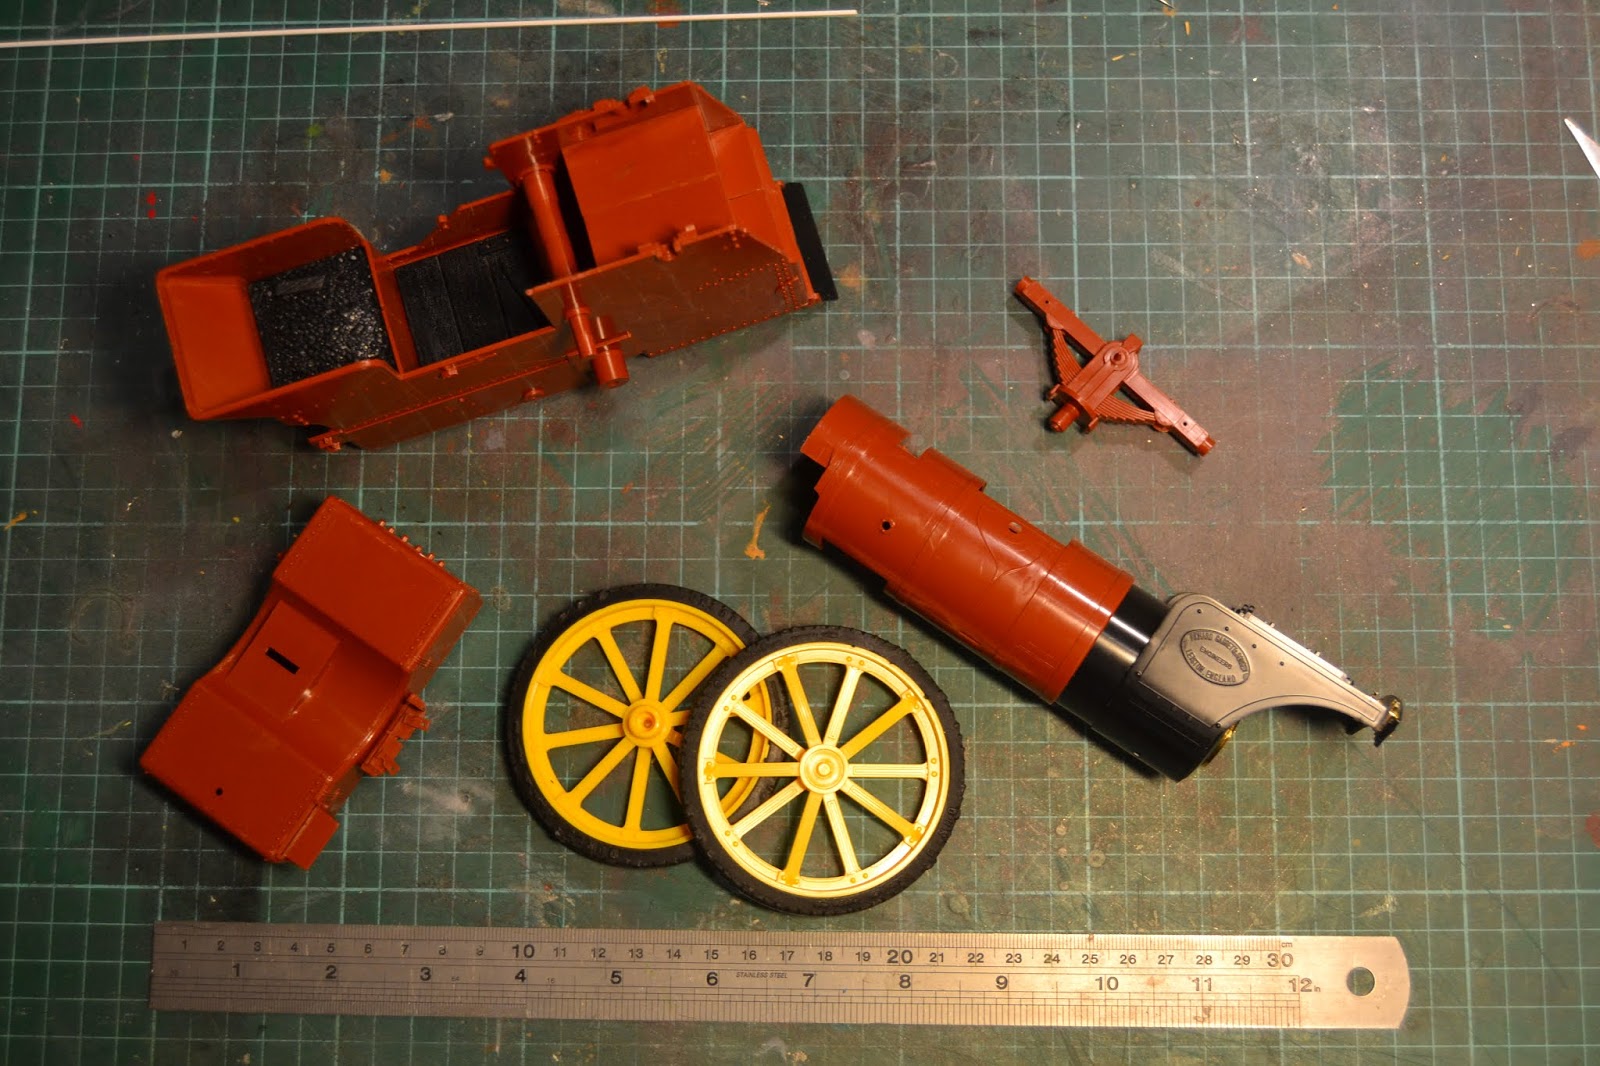
Two models I'm currently working on: the Bandai steam traction engine and the I P Engineering Lister.More about them in 2019.

My best greetings to all you readers and contributors to the blog. Thanks for your input and ideas, regardless if made here, on Facebook or an online forum. All the best wishes for health, modelling and life in general. Happy New Year!

Sunday 16 December 2018

Traction Engine Motion

The most complex part of the traction engine kit is the motion, rods and crank assembly. I studied the instructions and the made up my mind to do things differently. I prepared the parts, some of them needing filling and sanding. Now they are assembled I can see I should have been filling and sanding even more...

Rods, crossheads, cranks and most of the motion ready for assembly and mounting in the frames.

The parts in their bearings in the traction engine's frames. Rather than a lot of sanding on an annoyingly bad assembly beneath the cranks I simply cut a thin piece of plasticcard and glued it in place.
Due to some unfortunate delays in the manufacture of the electronic components for the RC equipment I have ordered for my little Lister, I'm currently holding work on that model off. The good thing is that my supplier is keeping me informed of the delays. I consider that good service. Christmas preparations are underway and work on my full scale heritage railways is also keeping me busy.
Da 7 built by Henschel in 1921 is still going strong and pulling this season's Christmas specials on HVB in cooperation with Danish built dieselelectric M 25. No snow for the December trains this year.

Saturday 8 December 2018

Traction Engine Progress

The Garrett traction engine is the focus of my attention for the moment. I'm waiting for a delivery of hexagonal plastic strips from the UK for fitting my Lister locomotive with some much needed bolt detail. In the meantime I'm busy assembling the traction engine.
Many parts have raised lines presumably to help decal placement. I'm sanding the lines off. Pipes coming from nowhere and endning on the middle of the water tank are dealt with at the same time. New pipes with proper functions will be fitted later. The sanding is mentally soothing. Nothing really to think about, just make sure a piece of plastic is worked into a flat surface. I'm using files and really cheap sanding sticks from the make-up section of my local super market.
I had a few title on the shelves of my library to help me get in 'traction engine mode'. Despite the books there are still a gadget or two on the model I don't what's for.
The wheels aren't fixed yet, but I've got the water tank and front wheel suspension glued in place. The cylinder assembly is glued, but can still be separated from the boiler. That will ease assembly of the motion and gears.
The Nystrup pixie finally caught on a photopgraph? No, it's one of my 1:35 figures posing with a 16 mm scale figure and traction engine to show what my change of scale means size wise.

Monday 3 December 2018

Hansen's Traction Engine

The local haulage contractor Hansen in Nystrup had a long history, even going back to owning a large number of horse drawn wagons and a traction engine. Their Garret steam tractor was the only from that manufacturer in Denmark and unusual in being service until after World War 2. The last year of operation is unknown, but the boiler inspector approved it for last time in Feburary 1950. When I saw a fellow 1:19 modeller assemble a 1:16 kit of a traction engine, I immediately started looking for a kit myself.

I was fortunate to win a kit on an auction on Ebay. Considering what I have seen other winners pay for their kits, I seem to have been lucky. Some of the prices seen are horrendously high! The kit from Japanese manufacturer Bandai is an ancient kit and much indicates that my particular kit was issued before 1978 (when I was in 2. grade). A historic kit in more than one sense!

Despite being an old kit the instructions are quite good and well laid out, although the assembly sequence is a little odd.
The kit had been started and some of the major components was glued together when I opened the box. A few of them will need separating as I will not build the model as a showman's engine with generator, roof and colourful paint scheme, but rather as a worn haulage contractor's machine. The kit is a fraction too large for my scale of 1:19, but that will only help to make the model more impressive.
The lid is off and I can begin to sort parts into those I will use and those I can donate to the bin. The kit is in several colours and one sprue is even gold plated. 
In addition to the build on the Narrow Gauge Railway Modelling Online forum, I have also found a series of images on a Canadian blog. The Canadian traction engine is much like how I want mine to look, only without the lengthened chimney.
The main assembled parts: frames, fron suspension, front wheels, water tank and boiler incl. smokebox.

I'm currently assembling the large rear wheels. I will be building the kit in a different sequence than prescribed in the instructions. I will build the model into a large structure first and then add the details.

Saturday 1 December 2018

3D Printed Figure Painted

My first 16 mm scale Modelu figure arrived and created mixed feelings. I was impressed by the pose and the overall impression was good, but detail was soft in many places. Particularly the facial detail was bordering on the unacceptable considering the large scale.


I cleaned up the figure with file and fine sandpaper. That treatment got rid of most of the very small attachment points from the printing proces. What took more effort was sharpening folds and demarcations between e.g. trousers and shoes. I managed to create a little difference of height in the worst spots.

The figure was primed with Games Workshop's 'Chaos Black' and painted with Vallejo matt acrylic paint. Folds in clothing were accentuated with darkened colours in the bottom of the folds and lightened paint on the tops. I highlighted  nose ridge, cheeks and chin with lightened skin colour. All skin areas had a very thin wash with rust oil paint to give the figure a tan matching an outdoor working guy.

On the figure's left arm was a weakly defined wrist watch. I tried to paint it as best as I could. For the watch's dial I punched a circle of ordinary white A4 paper and fitted it with clear varnish.
As good as it gets with my painting abilities. After a covering with matt varnish had dried, I added wear on the trousers and dust on the shoes with different colours of pastel chalk.

Even with matt varnish the waitscoat still seems shiny. Wear or a fancy fabric?
The figure now goes on one my shelves. There is a little more room as I after a remarkable fast proces have now sold and shipped a number of 1:35 locos and wagons to modellers around Europe. Less than 24 hours after having released a list of models for sale, most of the models had found new owners. Some was even sold before the list was released. I have been sent images of my models on their new owners' layouts. It's great to see them in action and serving their new owners well.
Ex. Nystrup Gravel skips now in use on the 600 mm gauge line on Langeland. Here seen parked at the sidings at Broløkke Halt blocking the way for a VW-bus. Photo: Arne Nielsen.