Wednesday 28 December 2022

2022 in Review

Once again the calender signals that a year has almost passed and a new one is waiting at the doorstep. Many people use these days to review the passed year's events and set new targets for the coming one. It's been a rather eventful year for Nystrup Gravel and I think it's fair to say that 2022 has seen my little layout develop so far that I can begin to contemplate it actually being finished some day.

Even without ballast or grass my little layout is beginning to resemble a model of the real Nystrup Gravel. The basic ground cover of kitchen rags and paint helps a long way to disguise the fact that the layout is only half finished.

One of the most important achievements of 2022 has been the progress made on buildings and structures on the layout. The lorry loading ramp was finished after the area underneath it had been fitted with static grass. I would have liked the ramp to be just a tiny bit longer, but in 1/19 scale everything is built under tight space restrictions. Finishing the ramp made it possible for me to complete the track on the layout, too. The final spike was pushed down without any ceremony in a typical practical industrial railway fashion - the next task was waiting. 

Lorry loading ramp finished and fitted with photo backdrop.

With a 1/19 scale layout in a small room I planned to add structures at each end to make the layout appear as a credible section of a much larger scene. For that purpose I added a wooden low relief building at the layout's left end and a low wooden fence at the right end. Both structures are supposed to act as view blockers diminishing a spectator's impression of the small layout abruptly coming to an end. In addition the wooden building represents a small part of the Nystrup Gravel sorting and gravel handling facilities and adds an important vertical aspect to the layout.   

Another aspect of presenting the layout better is the photographic background that I'm currently testing. Having previously had a white wall as a background a large printed photograph with a size of 90 x 270 cm was set up behind the layout in July. A few months later I ordered another print and combined they now act as complete backdrop to my developing layout. I'm not sure if the backdrop is the final solution as I originally aimed for something a bit more agricultural rather than the meadow now in place. Sometimes an easy 90 %  goal achivement is preferably to a difficult 100 % achievement. 

With an investment in two flood lights for photography on the developing layout I should be able to present better images. Results that readers of the blog should be able to see once I get used to using the lamps combined with the correct camera settings. Back in February I also finished my small group of railway enthusiasts with cameras. I had a group of train spotters in my old scale of 1/35 and was happy to see Modelu produce some nice photographers in 1/19 scale. I selected two figures and after a bit of work, they can now roam the layout in search of photo opportunities - in good lighting conditions. 

My two Modelu-photographers getting a rear shot of a Nystrup locomotive pulling empty skips towards the pits.

Two new locomotive arrived during the year. Unfortunately the little Lister is still the only operating loco on the layout. Something that will soon become an utter embarassment for management and staff. The Fowler F 30 from Essel Engineering was greeted with much celebration as it arrived. It is a good looking loco that will no doubt provide valuable traction power for the gravel company in the future. It is questionable if the other new loco will be as usefull - it's a toy Ruston from Triang. While I didn't keep my promise of expanding the stock of servicable locos on Nystrup Gravel, I at least managed to expand the number of locos!

The Essel Engineering Fowler F 30 arrived in June and provided my 1/19 scale version of Nystrup Gravel with a Fowler like the one its 1:1 prototype received in 1934.

Like in 2021 only one finished car arrived on Nystrup Gravel during the year: a Ford A towing vehicle underwent repair, rebuilding, painting as well as weathering and was fitted out with tools, oil canisters etc. I aquired a Citroen HY van that still needs to undergo the usual modifications. It's good to have projects available for a rainy day!


The Ford A lorry with crane was finished in early April 2022 and was quick to show support of a troubled country attacked by a much larger neighbour.


The characteristic shape of the Citroen HY shouldn't be missed on my layout. Here the model has just arrived from France and placed on my photo plank.

2022 saw the Nystrup Gravel-blog celebrate its 10 years of existence in April. On that occasion a post went through some of the blog's themes and my modelling adventures during the period. In 2022 the blog again contained a mix of modelling, archive studies and a few posts mentioning other aspects of how railways is a major component of my life. This year's activity on the blog has been rather high and the number of posts (45) has reached the level from the blog's first years. A sign of a year of active modelling, but also that I have been working to tell more about all the small things going on at Nystrup Gravel, like fitting a point lever or reporting a UFO incident. That is what modelling is for me: a lot of small activities adding up over time. 

It's no secret that I'm volunteering at the Hedeland Vintage Railway and this year the Hedeland area was visited by 32.000 scouts as well as huge number of visiting families. Our little railway passed right through the scouts' impressive camp and traffic was heavy with both scouts and visitors using the railway for transportation. For 9 days straight no less than 150 departures with steam and diesel provided faultless service to the camp. Not bad considering that some of our stock is more than 100 years old. 

700 mm gauge Da 7 departing Brandhøj Station located close to one part of the huge scouts' camp in Hedeland. A small train made even smaller by the sheer size of the camp! Da 7 is Henschel 18449/1921 and in service on HVB since 1994 (fitted with a new boiler in 2002).

After two years with very little travelling due to Covid-19 this year turned out to be very different. I have been trainspotting in France, Sweden, Germany, Spain and Norway. Some of the trips were dedicated railway tours while others allowed at least some time to be devoted to watching trains. No matter what, it was nice to explore railways with gauges varying from 600 mm to 1668 mm!

Ohs Bruk Järnväg no. 1 (Kalmar verkstad AB 36/1937) at Hedlandet Halt on the Östra Södermanlands Järnväg. The loco was rebuilt from the steam loco NAJ 2 (Motala 148/1894). My first visit to the 600 mm gauged ÖSlJ in 30 years.


Two broad gauge RENFE 319.3 class locos in front of the Al Andalus luxury train with 14 carriages at the station in Ronda. Note to readers: I wasn't travelling on the train. The minimum ticket price of 8.000 € seemed a bit pricey.

The year ended with work on lamps and poles for the track and loading ramp areas as well as some premilinary work on new narrow profile underground skips. Most of the work on those two projects will last into 2023 that will probably also see the complete layout being landscaped and beginning to look finished. I also hope to finally get more locomotives in operation on Nystrup Gravel. The Lister really isn't fit for heavier work on the line! 

One of six 3D printed underground skips that arrived in December being examined by Nystrup Gravel's chief mechanic. As usual he looks a bit sceptical with green enamel coffee cup in hand.
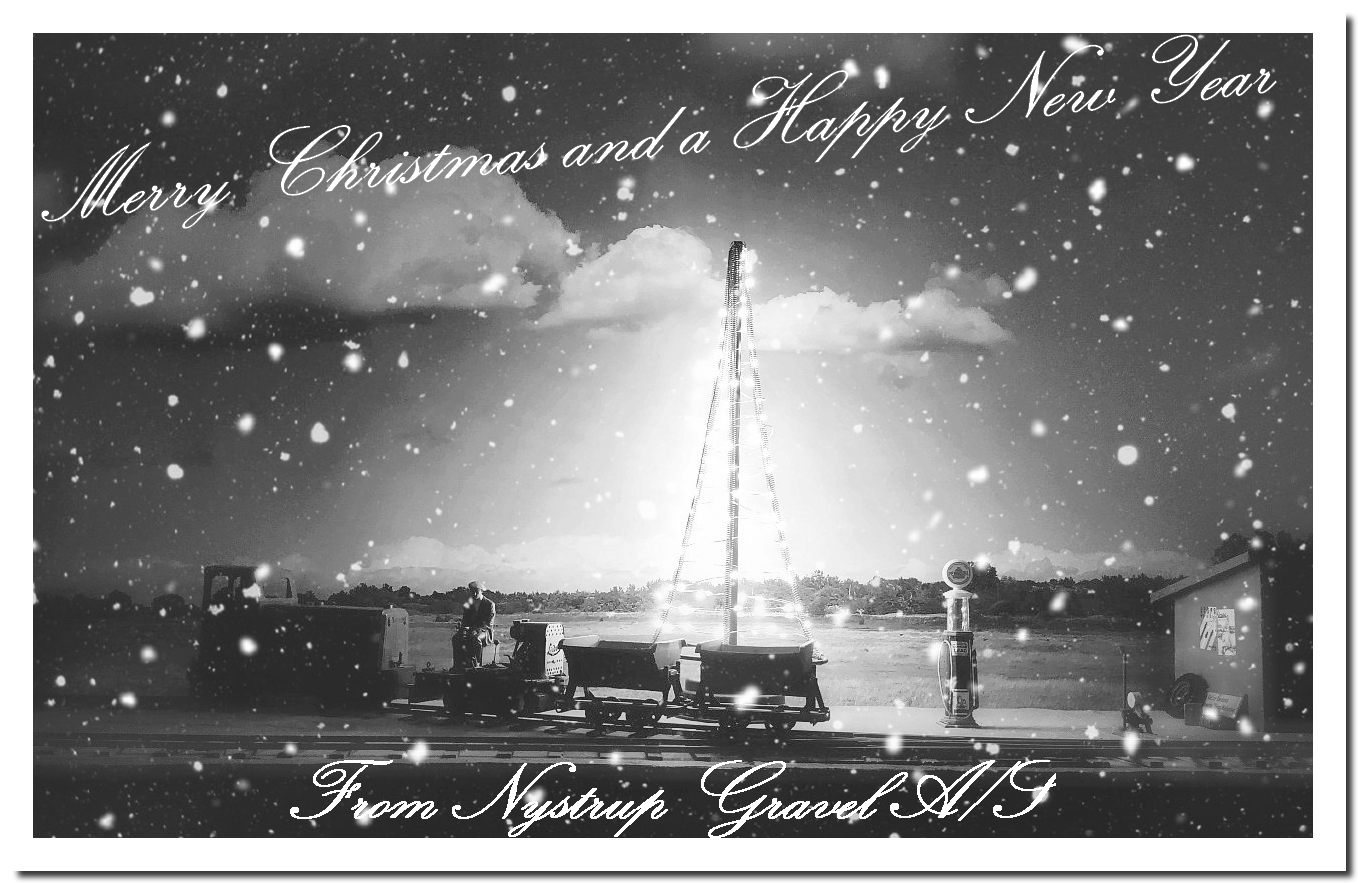
First version of homemade lamp being tested in total darkness. The lamp provides surprisingly much light. It will no doubt improve safety when shunting on dark winter afternoons.

Tuesday 27 December 2022

Light Experiments

Having received the 3D printed porcelain isolators next step in making working lights for the Nystrup Gravel involved good old fashioned manual modelling. My goal was to fabricate some typical 1950's outdoor lamps with a simple reflective screen.

My prototype version of a lamp testfitted on a wooden pole with election poster.

The starting point of my lampmaking was a LYM20 3 V H0 spotlight bought from ebay. The spotlights come 5 pieces to a pack and complete with resistors to enable operating from a 9-18 V power source. The spotligt is made from metal and fitted with a small LED and thin wires. The spotlight is movable on its bracket and can be adjusted as needed. Made for H0 the lamp is too small for my 1/19 scale layout, but I figured that with an appropriately sized reflective screen it would look realistic mounted on a pole or a building.

After a few test cuttings I produced a more or less circular piece of plasticcard with a diameter of 17 mm. for the lamp's reflector (corresponding to a reflector diameter of 30 cm i 1:1 scale). A 5 mm hole was punched in the center and a narrow slice was cut away to allow the reflector to be glued together in a flat cone shape. I used AC glue to obtain a good bond as I feared standard plastic glue would damage the thin plasticcard. When dry the reflector was cleaned up with a sanding stick and glued to the spotlight. 

Main ingredients in lamp making: LYM20 spotlight and plasticcard.

Light shines on a poster from my prototype lamp. The light level is enough to provide adequate light for work and shunting in the area around the pole.

I mounted the lamp on a wooden pole by drilling a hole through the pole and inserting the spotlight's mounting stub into the hole. The wires were connected with a 3.7 V battery and testing could begin. The light was of a good colour and the light level sufficient to provide a good light level for work around the pole. I think two lamps will provide adequate light for work on the Nystrup Gravel loading ramp.

Now I'm ready for the production run of 3-5 lamps for the layout's lighting plan.

Thursday 22 December 2022

Underground Skips

Being a hard working ordinary gravel line Nystrup Gravel's primary type of rolling stock is of course the side-tipping skip. From an old list we know that the company owned a mixed range of standard steel skips of German-inspired DIN-type as well as a few British Hudson-skips. Recent research in the company archives has now revealed that the company also had a number of Hudson underground skips with U-tubs and narrow profile. 

Workshop manager Petersen inspecting a newly arrived 3D printed underground skip. 

With documentation for underground skips on the prototype Nystrup Gravel my model of the gravel line obviously had to have some as well. I found some rather credible looking 3D printed U-tub skips resembling a well known British type built (or at least marketed) by Hudson. Recently I have had rather positive experiences with 3D printed products including loco parts, porcelain isolators and figures. My first 3D model was a Schöma locomotive back in 2013 when I was modelling in 1/35 scale.

Four standard skips set aside for the weekend. On my 1/19 scale model of the Nystrup Gravel I have a mix of DIN- and Hudson-type skips just as the real gravel company had. A single Hudson can be seen far left. Now a new type of skip will soon join them.

Nystrup Gravel wasn't home to any underground activity (except for some resistance activities against the German occupation 1940-1945) and the reason for having underground skips were most likely some limited clearances inside one of the buildings in the Nystrup Gravel complex. The few images I have so far seen of the wagons shows them dumping ash and general waste in the emptied part of a gravel pit. Observations that could point to their use for transporting waste from within the production facilities.

A page from a Hudson catalogue showing various U-shape skips for underground use. Here sourced from the website of The Yorkshire Group of 16mm N.G. Modellers Ltd.

The 3D printed kits are sold as 'SM32 16mm Scale Hudson Skip Kit' on ebay. It is mentioned that the parts are printed in polyethylene terephthalate glycol. The kit consists of two large parts (frame and tub) as well as four smaller parts (wheels). I had 6 skips shipped as I like to have a number of the same type of wagon. On Danish industrial railways a single wagon of a type wasn't the norm, as most industries bought rolling stock in batches. I continue that shopping habit.

One of the U-tub skips taken directly from its zip-lock bag. More awaits unpacking in the background.

Newly unpacked skip seen from a slightly different angle.

Skip and tub separated with wheels in the foreground.

Close-up of the 15 mm diamater wheels which are of questionable quality, at first glance at least.

The parts are rather finely printed with no large marks from the printing proces. On some surfaces there is a very fine layering pattern visible. The bottom of the U-tub isn't genuinely half-round but 'stepped'. Both effects are known disadvantages from the printing proces and the design/drawing phase. The layering effects have diminished in the recent years due to advances in printing technology, but ruined most small scale 3D printed models some years back. Usually the effects are less serious in large scales where it is also a little easier to remove or cover them with surface texture and paint.

A view of the underside of the skip frame.

As customary on late Hudson products the open end of the U-profile is on the inner side of the frame. 

The prints are very light weight and I suspect that will be a challange if not taken care of. Even if I find appropriate metal wheels I will probably have to add weight to make the wagons run well on my prototypically bad industrial railway track.

A look into the tub. There is no detail on the tub's inner surfaces. I will decide if I fill the tubs with a load or fit detail to at least the upper inner surfaces.

A tub seen from below. The rivets are nicely done.

From this view the tub's riveted construction is clearly visible.

I have ordered brass piping with an inner diameter of 3 mm to be used as bearings and 3 mm axles. That should enable me to test the printed wheels on my track and find out if metal wheels are a must. 

Have you similar wagons in service on your 16 mm railway or any advice on where to find 15 mm diameter curly spoked wheels that will match the skips? Please leave a comment or e-mail me at nystrupgravel@gmail.com

Monday 12 December 2022

Merry Christmas!

I want to wish every reader of the blog a Merry Christmas and a Happy New Year. It's been a comparatively productive year for Nystrup Gravel with focus on tracklaying and work on the little layout including buildings. Thanks for your comments and sharing of ideas.

Christmas is a season of tradition. This year Nystrup Gravel has produced yet another horrendous Christmas card.

As usual I will celebrate Christmas with my family. With covid out of the equation everything is back to how it used to. If the holidays will also provide time for som railway modelling remains to be seen. Hopefully a day or two can be set aside.

My thoughts go out to all those around the planet struggling to make ends meet, provide for children and basically just survive another day. This year a special greeting goes out to the people of Ukraine. I wish them victory, freedom and peace in the year to come!

Thursday 8 December 2022

Porcelain Isolators

When I was in need of a wooden post to hang election posters in, I quickly made three posts from a length of suitable wooden profile. I have planned to fit light on strategic spots on the layout to enable late evening and early morning shunting. The posts would be perfect for mounting lamps on, but would need isolators and wires. On my 1/35 scale modules I used isolators made from turned brass but they are not produced in 1/35 nor available in the correct profile.

A 20 piece 3D printed double row of Danish pattern porcelain isolators in 1/19 scale.

A glance through some of the websites offering 3D-printed parts didn't reveal any particularly Danish looking porcelain isolators. As I'm a lifelong member of The Telegraph Pole Appreciation Society I just couldn't plonk some British isolators on a Danish pole. Consequently I turned to a well-known supplier of special objects for model railways in Denmark, Per Møller Nielsen of Epokemodeller.

Being a telegraph pole appreciator 21. September holds a special place in my calender. A day of solemn appreciation.

A new pole with lamp and isolators placed among 3 other poles on the new platform at Hedehusgård Station, the Hedeland vintage railway (HVB).

Having recently seen four poles with lamps and isolators being erected at the Hedeland vintage railway I had measurements and plenty of images of the porcelain isolators and provided these to Per Møller to aid in his design of some 1/19 3D printed isolators. Within a week I received 3D drawings for review, the files were then printed and 30 isolators were delivered safely packaged in my mailbox.

A full size isolator. It is now fitted to one of the recently erected poles at HVB. As always it is an advantage to have access to a full size prototype of a modelling object.
 
Visual representation of the print file for 2 x 10 Danish porcelain isolators. Photo: Epokemodeller.

The isolators are printed in a semi-translucent resin material. There is no trace of the printed layers that marred many 3D printed products a few years ago. To avoid printing the isolator mounting bracket integral with the isolator, Per designed the isolators with a 1 mm hole in the bottom (of course inspired by the real ones) for mounting on a 1 mm bent metal wire. A metal wire will be much more resistant and solid than a printed bracket.  

I have only separated a single scale isolator from its printing base. I sanded the small attachment point away and mounted the isolator on a copper wire quickly bent up to resemble the usual bracket. For ease and consistency I think making a small jig for bending mounting brackets will be needed.

My test mounted 3D printed porcelain isolator. I like the correct shape of the isolator matching the prototype I was aiming for.

With 3 wooden poles ready I will now experiment a little with making a jig for bending brackets and figuring out what I can use for electrical wires to hang on the isolators. EZ-Line is probably not quite up to the task as I think I will need to show the wires sagging in the large scale of 1/19. Perhaps thin copper wire will work?