Monday, 28 August 2017

Modelling Inspiration

Ideas aren't coming from nothing. My inspiration comes from a wide range af sources. I have previously written about one particular book that has inspired me. In this post I will take you through a few other sources of inspiration.
A small narrow gauge peat railway in Klosterlund, Denmark. It's summer, the air is hot and I can almost hear the larch singing in the sky. The flowers are in full bloom and from the moor in the distance a little locomotive is pulling three simple wagons with peat over light and crooked rails. Behind the train you can just about see a few cows resting and enjoying the good weather. Just the kind of railway I love!

Obviously reality is a primary inspiration for me. Who wouldn't be inspired by the above photo? There are more great prototype locos and scenes than I can ever manage to model even if I lived to be 100 years.


Other modellers' work surely inspires too. I pick up that inspiration from several sources. The work of many talented modellers appears in Narrow Gauge and Industrial Railway Modelling Review and I honestly don't know where I would be modelling wise if that magazine wasn't available. A huge 'thank you' to editors, helping staff and authors. If you are not a subscriber, consider becoming one. Find out how to order a subscription here.
From my 'Review' collection. I'm still looking for issue 1. The open magazine is issue 47 with a briliantly written story of a small 0-16.5 slate quarry. Shows that inspiration doesn't have to come from one's own scale or theme.


However great a real paper magazine is, online inspiration can be found as well. A myriad of sites offer images, films and descriptions of real industrial railways (usually long gone, unfortunately) and advise on how to model them. The best I know is the NRGM-forum. You have to acquire a login, but that tiny trouble will repay endlessly. The forum is frequented by friendly expert modellers from all over our planet - some of them known from the 'Review'.


On my work bench I'm learning new things. Last evening I practised my weaving techniques as I was making revetments for my French artillery position. I used tooth picks and cheap wire from a hobby shop.
A short section of weaved revetment in 1:35 scale. My test worked out rather well. More sections are on their way.

Tuesday, 15 August 2017

Gun Emplacement Progress (1/35)

I have continued working on the French gun for my World War 1 diorama. The gun is now completely assembled, primed and painted. The kit went together well although there was a casting seam along the barrel that I didn't succeeded getting completely rid off. I left the wheel assemblies unglued as I wanted to be able to finetune the wheels' positions when fitting the gun into its emplacement.
The gun and recoil ramps ready for primer.

Gun primed with 'Chaos Black'.

The cover paint was mixed from several Vallejo greys and blues with a little white added. The shoes on the wheels were air brushed a light earth colour.
The gun painted.
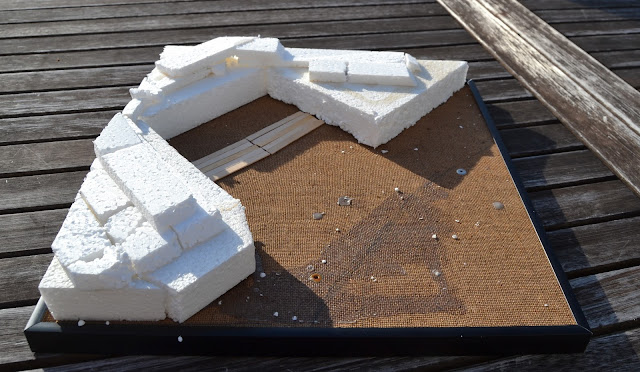
With the gun well in progress I turned my attention to the diorama. I pulled out a picture frame the size of an old fashioned (or retro if you like) vinyl 33 rpm. LP record. With the glass removed it is a good starting point for small diorama in 1:35 scale - and a handy size for storage.


I played around with the gun and length of track to decide how to position them best. With everything settled I started building up trench walls and cutting timber for the gun pit.
Building up trench sides and test fitting floor timbers. The track will cut across the open ground in a gentle curve.
In my research on French trench design I stumbled over a modeller - Andrew Belsey - who does the most beautiful trench dioramas.
One of Andrew Belsey's trench cross section dioramas in 1:32 scale.
See his work on this blog. There is a lot of good tricks on how to do detailed groundwork and small details. My dioaram will not be as finely detailed as Andrew's!


Thursday, 10 August 2017

Refitting switch panel (1/35)

After having finished the switch panel on the factory module, I thought the panel on the loco shed module could do with a little refurbishment. I had removed half the switches when Nystrup Gravel turned to digital command and control.
The old panel removed, the cut out cleaned up and ready for a new panel with no surplus holes in it.
The new panel in place, although I will have to correct its crooked angle. The panel is kept in place with double sided tape so it's no big thing to fix.

While I had the module out in the garden I took the opportunity to take a few snapshots as darkness settled over the loco shed.


Friday, 28 July 2017

Module Finished (1/35)

The bakelite factory module is now finished (well as finished as a model railway ever gets). This afternoon I took advantage of one of the last days of my vacation to install wires and switches for the lights in the buildings. The switches and 12 V socket were arranged on the front of the module.

While the module gradually evolved towards finishing last summer, a few 'bald' spots still remained. These were taken care of this nice summer evening while I enjoyed the working lights in the buildings.
As the sun sets there is apparently still activity inside the buildings.

One guy went home after turning out the lights.

Finally the last guy at Banke's Bakelite closed up as well.

A driver and his Bedford O having a little break in front of one Nystrup's small industries.The little 600 mm. gravel line running between factory and parking area is almost invisible.

In the yard of Pedersen's Machine Shop a lot of work must have gone into a thorough clean up. No trace of all the metal parts usually strewn everywhere. Shortly after this photo was made, stuff began to build up again.
Being a slow modeller I seem to take forever to get the smallest of tasks done. I'm glad I only build a small module at the time. A whole layout would probably feel quite overwhelming.

Wednesday, 12 July 2017

Ruston & Bucyrus Excavator (1/35)

In my last blog update in June I showed some new photos of Nystrup Gravel's large Menck excavator. Nystrup Gravel's first excavator (as far as I know) was the Ruston & Bucyrus delivered in 1938. Here are a few images of the machine in one of the gravel company's pits west of Nystrup.
The excavator driver obviously had a hard bicycle ride to the gravel pit. Here he is taking a break before beginning the day's work.

A side view of the Ruston & Bucyrus RB-17.

The R&B excavator is a 1:35 resin kit from Accurate Armour and a brilliant kit. I highly recommend it. Even if the kit is large and looks complicated you don't have to be an expert to put it together and produce an excellent result. I built my excavator in 2003 and made minor changes to the kit parts, primarily to show off some of the detailed interior.
A rear view during construction. I cut out the right rear door to show off the engine and radiator.

The interior during painting. I still haven't fitted wire to the drums.

The finished excavator on a heavy load trailer.


As usual the tracked tractor 'Stalin' was standing in the pit waiting for its next task. The tractor originally belonged to a Soviet Army artillery unit, was captured by the German forces in 1941, brought to Denmark and bought by Nystrup Gravel after the war.
Lovely weather and a robust piece of equipment.

Monday, 3 July 2017

French Artillery Position (1/35)

I have previously built several 1:35 models of wagons and one loco from the French artillery railways of World War I. As we are currently 100 years away from that historic conflict I had planned to build a WWI model each year between 2014-2018 to commemorate the war. I have been quite unable to keep that promise.
My scratch built 1:35 model of a Campagne petrol loco from the French Army. Here it tows a standard Pechot wagon built from a 13'me Dragon kit in resin and white metal.

Charmed by a Blitz kit of an antique looking French cannon and motivated by a friend in France, I am planning  to at least partially keep my promise. My friend in France gave me the chance to buy a kit from long gone 13'eme Dragon from Paris of a Pechot Citerne wagon. I will be making a little diorama with a gun emplacement, a length of track and some figures. The Pechot Citerne (or any French 600 mm. wagon) can be placed on the track.
Col de la Schlucht: a 120 mm Modele 1878 in position in a wooded area at the foot of the German strongpoint Lingekopf in the Vosges region. Image from the Academie de Strasbourg.


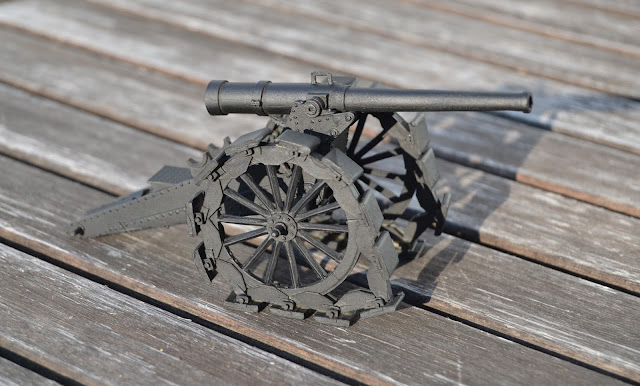
The 'de Bange 120 mm modele 1878' beginning to look like the prototype. I still have to fit the 'shoes' to the belts around the wheels.

The assembly of the gun is progressing well . The parts fit well and the 'shoes' on the wheels took much less effort than I had anticipated. Consequently it may be ready for priming and painting quite soon. The Pechot wagon is next on the schedule together with a base for the diorama.
Unpacking the Pechot kit. The water tank is a heavy lump of resin. Two cross members mounts underneath for bogie mountings. The majority of parts are for the bogies.

Sunday, 25 June 2017

A Visit to the Gravel Pit (1/35)

As the weather was sunny I took a bike ride to one of Nystrup Gravel's active gravel pits. I wanted to see if I could get a glimpse of some of the equipment Nystrup Gravel used for digging up the precious gravel. There were no problems entering the pit and no one objected to me taking a few photos.

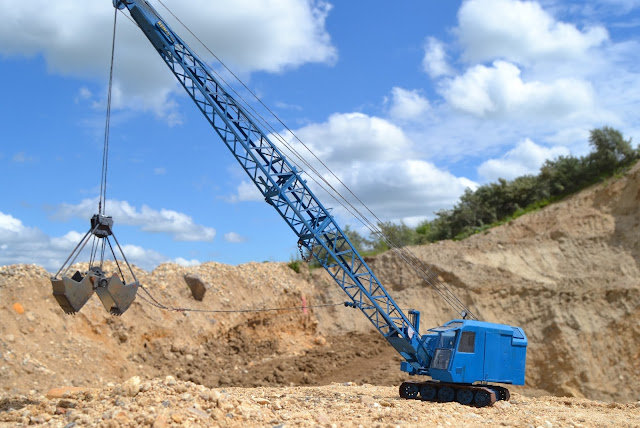
Nystrup Gravel's large Menck M 60 was working in the eastern end of the gravel pit. It looked as if it was preparing to relay the 600 mm. tracks in that part of the pit.

An action shot of the Menck swinging its bucket while working in the pit.
Apart from the new Menck excavator I also located the old Stalinets tracked tractor. The tractor was used to pull equipment in the gravel pits and to pull up trees before removing the topsoil when expanding the pits.
The Soviet tractor in service at Nystrup Gravel. I forgot to remove my bicycle before taking the photograph
I didn't manage to locate the Ruston & Bucyrus excavator, but it could have been working in the western part of the pit or in the other pit. Read about Nystrup Gravel's excavators here.