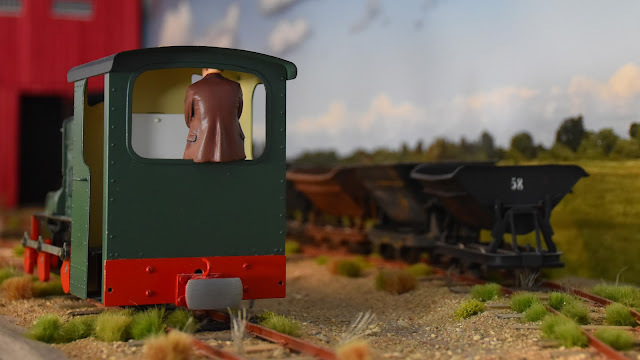
Relaxed modelling over the Christmas holidays has produced a finished figure of the driver in the Fowler locomotive. As usual it is a Modelu figure adapted to its role and position on my Nystrup Gravel layout.
 |
| You only see the back of the driver. But he is there and he will stay in the cab, even during a derailment. |
In the previous post I had begun adding material to the back side of the figure. I converted the figure to fit on the edge of the lower part of the rear wall in the cab. I added enough 'Green Putty' to create an overhang of the figure's jacket and a narrow 'channel' to fit over the cab's edge. This allows me to carefully remove the figure while it will still be held in place during most operating situations. Once the general shape was obtained I added putty to even out the surface and sanded everything smooth. It takes several stages of sanding and putty and a decent amount of patience.
 |
| Rear view of driver test fitted in the cab. The green is added material from 'Green Putty' to the original Modelu figure. |
 |
| After priming with 'Chaos Black' painting is now in progress. |
When I was satisfied with the figure it was washed with hot water and a soft brush. After drying overnight it was primed with my favourite primer 'Chaos Black' from Citadel. For the layers of covering paint I used Vallejo acrylics. The jacket was painted first in 70940 'Saddle Brown' then the shirt was painted white (70951) the sweater 70837 'Pale Sand'. I then painted the skin areas and shadows in the clothings' folds were accentuated with a darker tones of the colour as appropriate. Once the upper parts of the figure were painted I painted the trousers 900 'French Blue' and the shoes a dark grey. I didn't spent a lot of time on detail painting and facial detail as the figure isn't particularly visible in the cab. Once finished I air brushed a layer of matt varnish over the figure to protect the paint and give the clothing a flat look. Skin areas were given a thin wash of oil paint.
 |
| The finished figure in the cab. Notice the tight fit on the rear wall and wooden blocks for use in case of derailments. |
 |
| Here the driver is out of the cab for a brief moment to show off in all his glory. |
The brake coloumn was finished alongside the figure and I also got it primed and painted. The testing of different shapes of wood for the wooden blocks to be used in case of derailment was worth the trouble. I decided on quite different shapes and sizes than I had originally planned. The blocks were sanded and dyed with light grey wood dye.
 |
| The driver is partly visible through the front cab windows. At least as long as there is no glazing. |
After the driver figure next up is more interior details like sand boxes, panel with gauges and switches as well as the necessary levers.


No comments:
Post a Comment