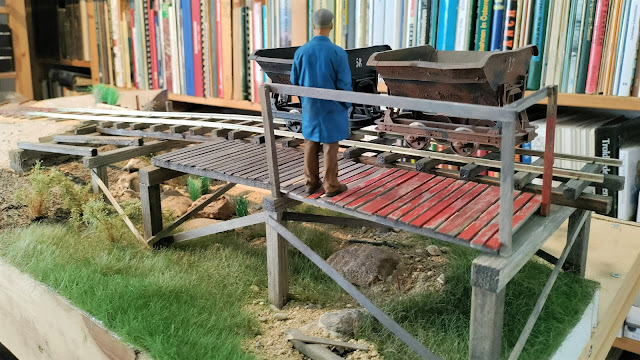
The loading ramp is finished. Well, as if anything ever get's finished on a model railway! Of course I will be able to add more details, extra plants and more of the small finishing touches that will make the ramp area really good looking. For now I'll call it finished.
yy.jpg) |
Not a lorry in sight! Everything else is ready to enable a load of high quality Nystrup gravel to be transported to a construction site.
|
While a very simple structure, the ramp took a considerable time to finish. Not least because 1/19 scale is still a new scale to me. Getting the feel if a board is the right size for 16 mm scale or too flimsy hasn't quite become habit. Simple or not, the ramp nevertheless contains no less than 234 major parts (I'm not counting the small plastic bolt heads!).
.jpg) |
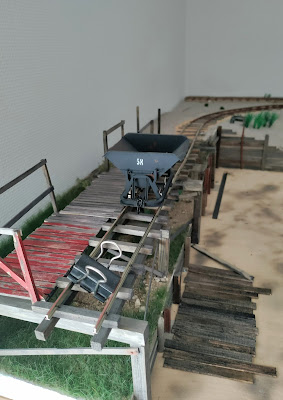
| Here the track is almost finished and two skips help me adjust the protective fencing to avoid it interfering with the tipping process. The workers' platform is growing. |
As the prototype, my loading ramp is a very simple structure. The Nystrup Gravel lorry loading ramp basically consists of a lot of coffee stirrers, rocket sticks, wooden sticks of different lengths and dimensions. Most of the parts have been (mis)treated with sanding sticks, knife and steel brush to get an aged look. All parts were then given one or more layers of grey water based wood staining fluid. Once dry some of the boards were given a patchy cover of red acrylic paint to resemble reused boards from a torn company shed. All wooden parts were joined with standard white glue.
Once the ramp, including sleepers were in place, I cut and prepared the Peco Code 143 rails. The track was built as standard track with spikes and soldered fishplates. After a test run with locomotive and skips, I could finally declare all trackwork on the layout for built and working.
.JPG) |
| Fishplates soldered in place. Painting the rails can now continue. |
With the track finished, painted and working, I built the workers' platform next to the track. The platform gave the workers a relatively stabile, spacious and safe working environment for their work tipping the skips. By constantly checking clearances with my two types of skips, I hope not to experience any operating difficulties in the future.
.jpg) |
| As an interim solution I used a metal clip to avoid trains accidentally falling over the ramp's end. Here the walkway is under construction. |
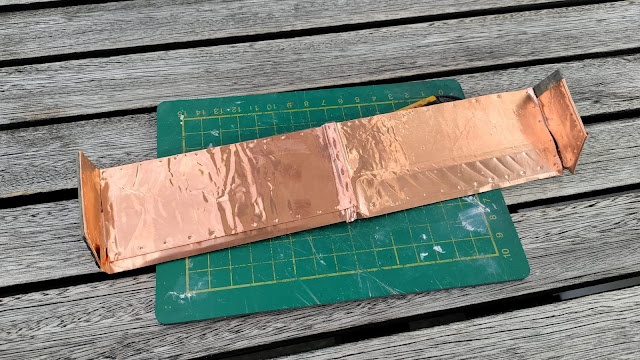
To allow the gravel to easily transit from skips to lorry, the loading ramp is fitted with a slide overhanging one side of the ramp. The construction of the slide on the prototype seems to have been a simple slanted wooden platform clad with steel sheeting. With the limited height on my ramp there isn't much room for a slide. Nevertheless I added a short slide made from wood dressed with some copper foil I had in a drawer. I added subtle height differences under the cladding to underline the primitive construction.
.jpg) |
| The slide in progress. One half fitted with copper cladding, the other half still in naked wood. The edges have been stained light grey to avoid unrealistic natural wood showing through. |
.jpg) |
| Completely copper clad. Ready for primer. |
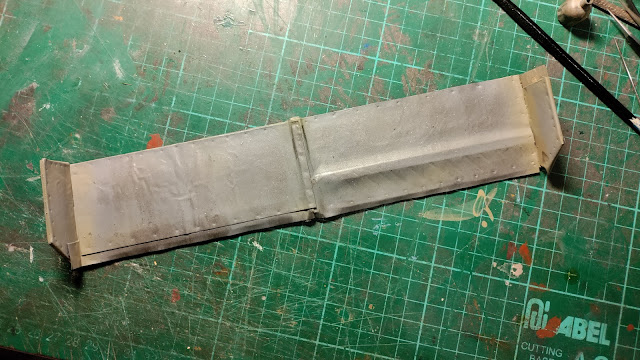 |
The slide is primed, painted and weathered.I used several grey colours that was air brushed thinly over the primer. Light earth paint was applied in corners and crevices. The large areas were rubbed with graphite powder.
|
Weathering of the ramp was accomplished in stages as some parts of the ramp would be inaccesible if I had left all weathering jobs until the whole structure was finished. Most of the weathering consisted of applying wear on the wooden walkway, rust around the few steel parts and a general covering of dust of horizontal surfaces. Regarding painting of the rails on the ramp, they got the usual cover of '113 Rust' from Humbrol's acrylic range. I also used some new waethering products from Green Stuff World on the rails - more about that later.
Not really a part of the ramp, I took the opportunity of using some of scrap wood parts to reinforce the gravel and dirt road surface immidiately below the ramp with heavy wooden planks. This is one area where a lot of work is still required.
y.jpg) |
A closer look at the ramp from the road side. I'm glad I got the vegetation in place before building the ramp's upper part. It would have been impossible to fix grass and plants with track and slide in place.
|
y.jpg) |
The loading ramp seen from the works side. It's obviously that the ramp was erected from whatever was at hand. Countless dimensions and boards from old sheds can be seen in the construction.
|
The lorry loading ramp has been an enjoyable task. I'm glad to have it finished (even though I have already found a few spots that could need a little more work) and will now give my worktable a good clean up. There are pieces of wood and sawdust everywhere and that has to go before the next project arrives.

yy.jpg)
.jpg)
.JPG)
.jpg)
.jpg)
.jpg)
y.jpg)
y.jpg)
No comments:
Post a Comment