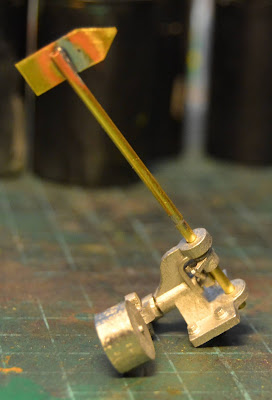
In short breaks in a period of some hectic work schedules I have been able to assemble one of the point levers from Feld-, Garten- und Grossbahn. The white metal castings were well cast and only sporadic mould lines were present. They were removed with sanding sticks and the holes cleaned up with a round file. The casting representing the lever's handle looked a bit odd, and I will be replacing it with a piece of heavy wire.
 |
| Almost finished point lever with home made direction indicator. |
 |
| Prototype point lever of the same type photographed on the Hedeland Vintage Railway. The upper bracket for holding the direction indicator has broken off. |
Assembly of the cleaned up parts wasn't too difficult. Just remember to test fit now and then to make sure you don't get the holes opnened up too much, which will make the lever wobbly in service. The only real test provided was the drilling of a 0,8 mm hole for a piece of wire to be superglued into the axle holding the weighted arm of the lever. With plenty of light and a pair of steady hands it worked out in the end, producing a working lever.
To indicate which way the point is set, the lever kit is supplied with a lantern that can be fitted with lights. That is a bit too fancy for a simple industrial railway like mine. I chose to fit the lever with a home made direction indicator from a brass pipe and a piece of brass cut to shape with a pair of scissors. Assembled with solder, the job was done in no time.
 |
| A large peg allows the lever assembly to be firmly attached to a sleeper. |
 |
| The pin and arms that operate the direction indicator can be seen fitted to the right hand end of the lever's central axle. |
With only a handle missing, the lever will soon be put in a box waiting for track laying at Nystrup Gravel to begin. I'm currenty in the process of cutting ties for my first track.

No comments:
Post a Comment